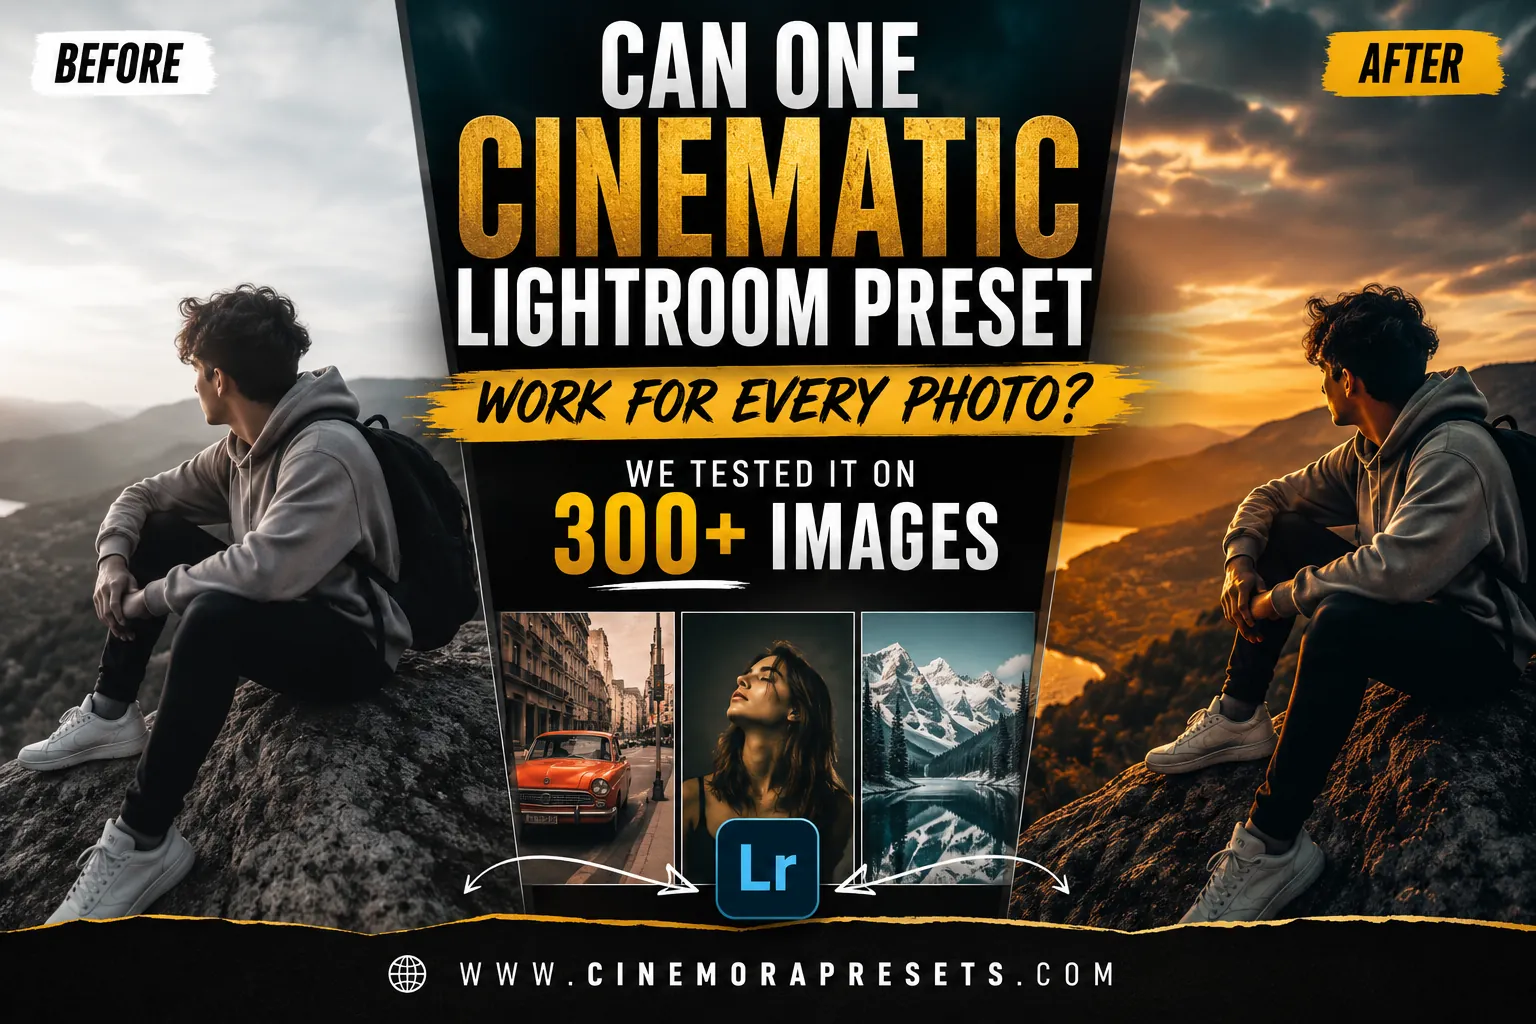
If you have ever searched for a cinematic Lightroom preset, you have probably wondered if a single preset can actually work on all your photos. Most preset websites only show a few perfect before-and-after examples. They rarely show what happens when you use that same preset on hundreds of real-world images.
We wanted to find out for ourselves.
Over the past few weeks, we took a single preset from our Cinematic Lightroom Presets collection—specifically the first preset in the pack, named "Cyberpunk Cinema"—and applied it to over 300 photos. We did not just choose the best photos. We tested it on outdoor portraits, indoor shots, mountain views, green forests, sunny beaches, cars, and dark night scenes.
Our goal was simple: to see where this cinematic style shines, where it struggles, and if it can actually save you time when editing.

How We Conducted the Test
To keep the experiment fair, we followed a strict rule: we applied the preset to every single photo without making any manual adjustments first.
Only after seeing the initial result did we make small, quick adjustments—like changing the overall brightness (exposure) or adjusting the temperature (warmth and coolness).
Here is exactly how the preset performed across different types of photography.
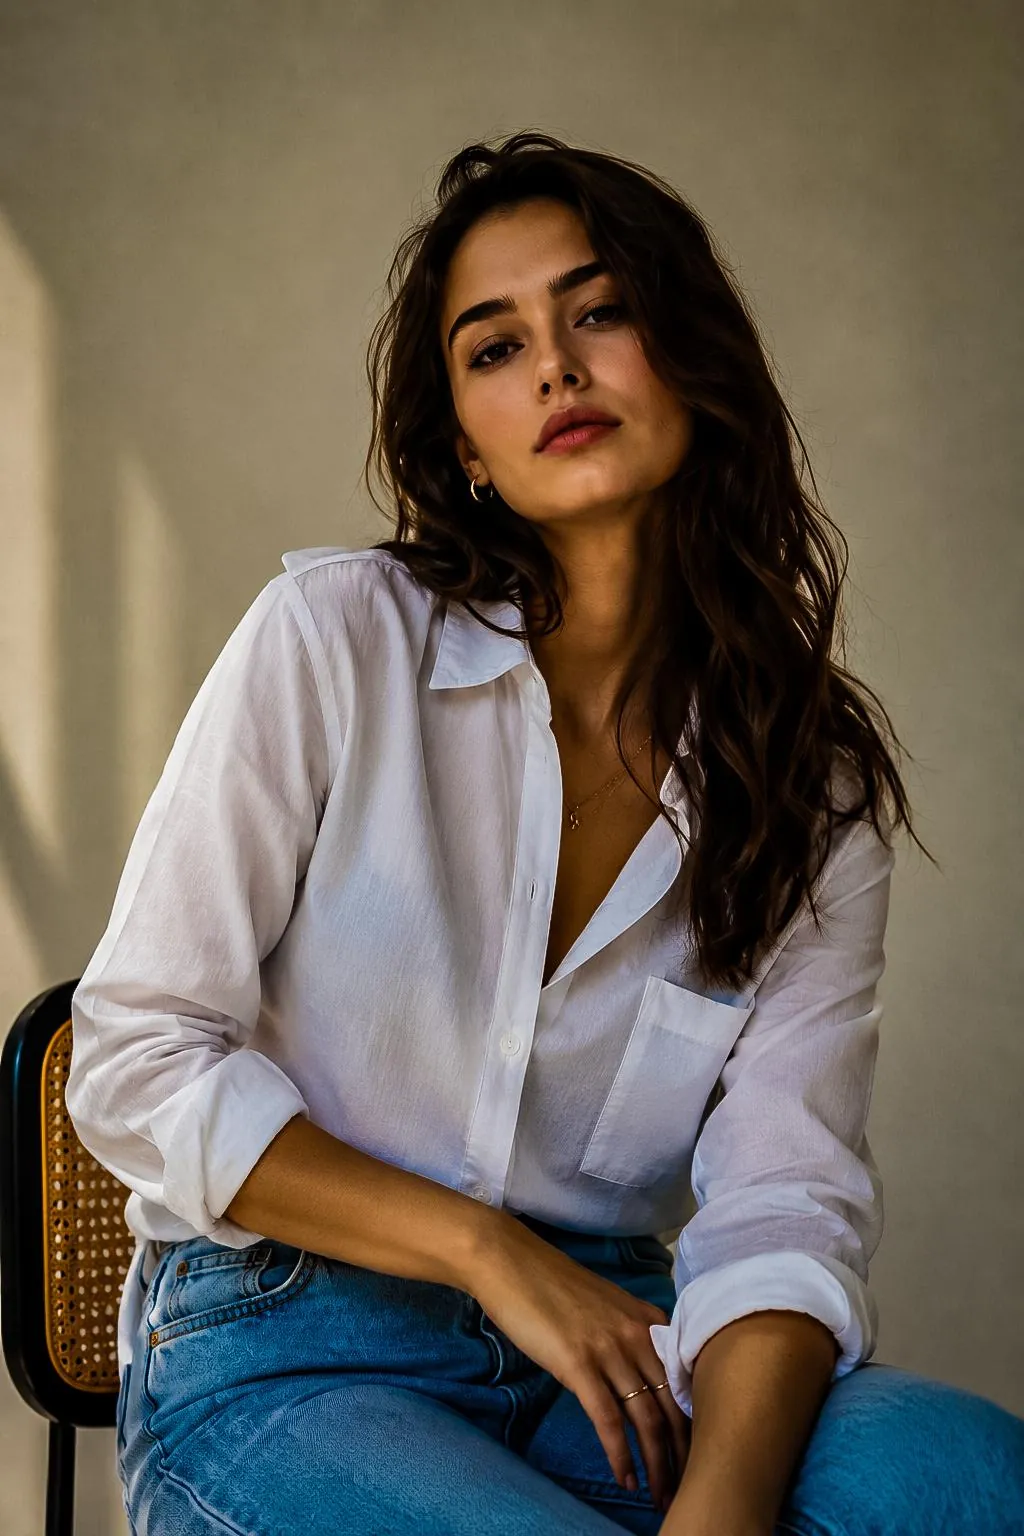
1. Outdoor Portrait Photography
Outdoor portraits produced some of the most beautiful results of the entire test.
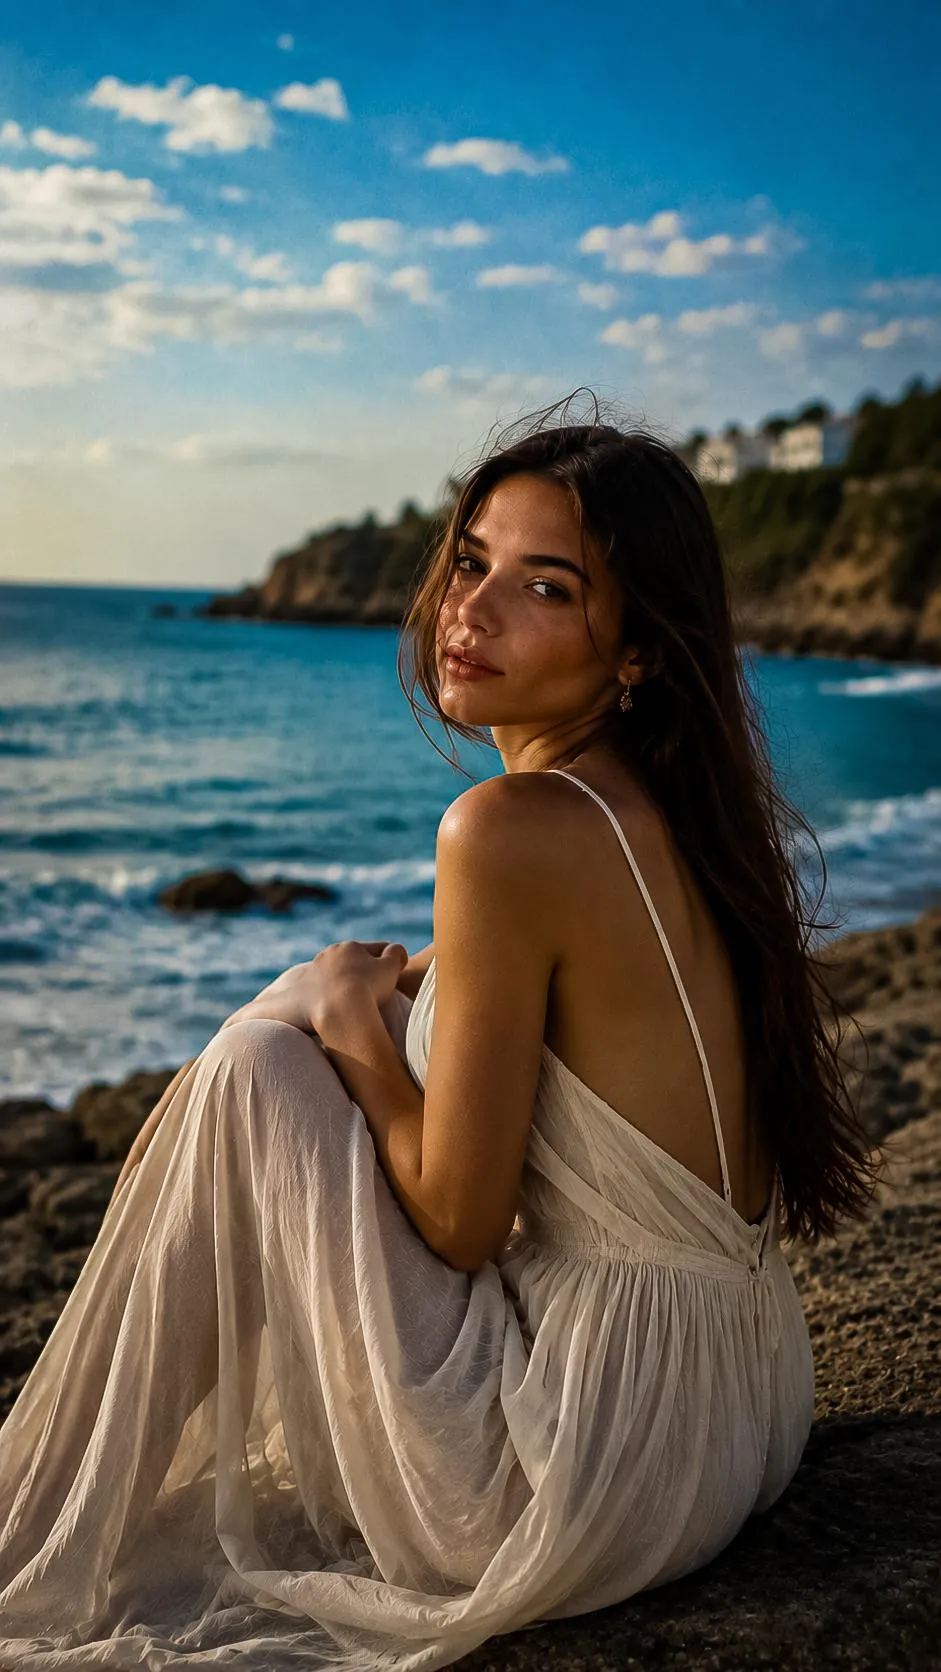
In the first portrait, the original photo was very bright and slightly washed out. Applying the preset instantly brought out deep contrast. Skin tones received a healthy, warm glow, while the light pink dress looked more vibrant. The most impressive change was the water in the background: the preset shifted the washed-out blue into a rich, deep turquoise teal.
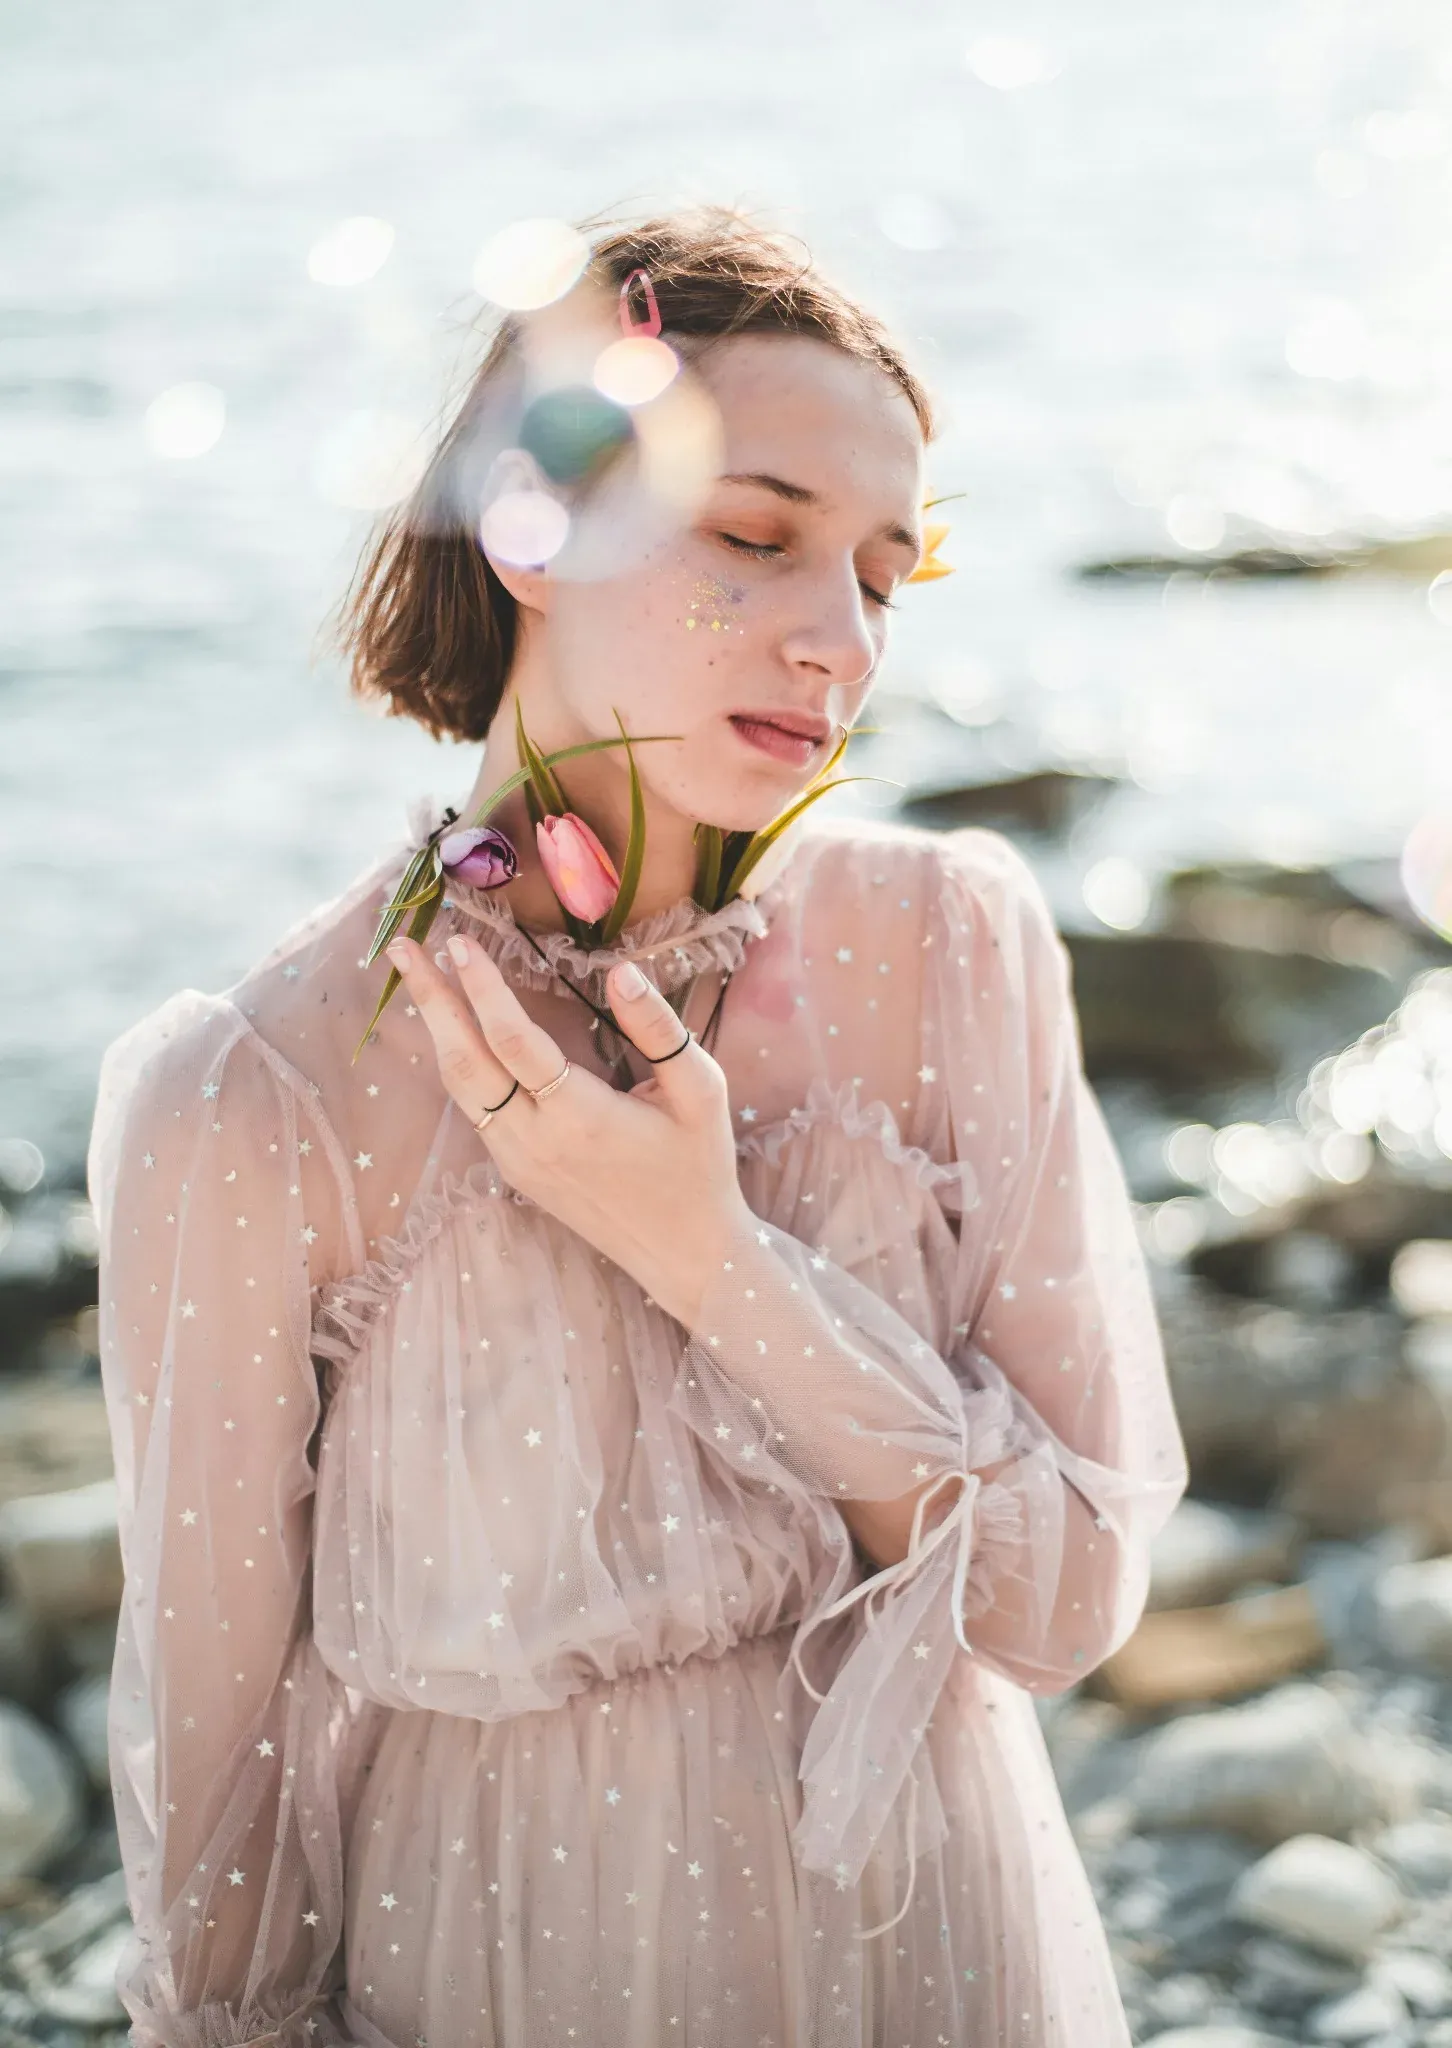
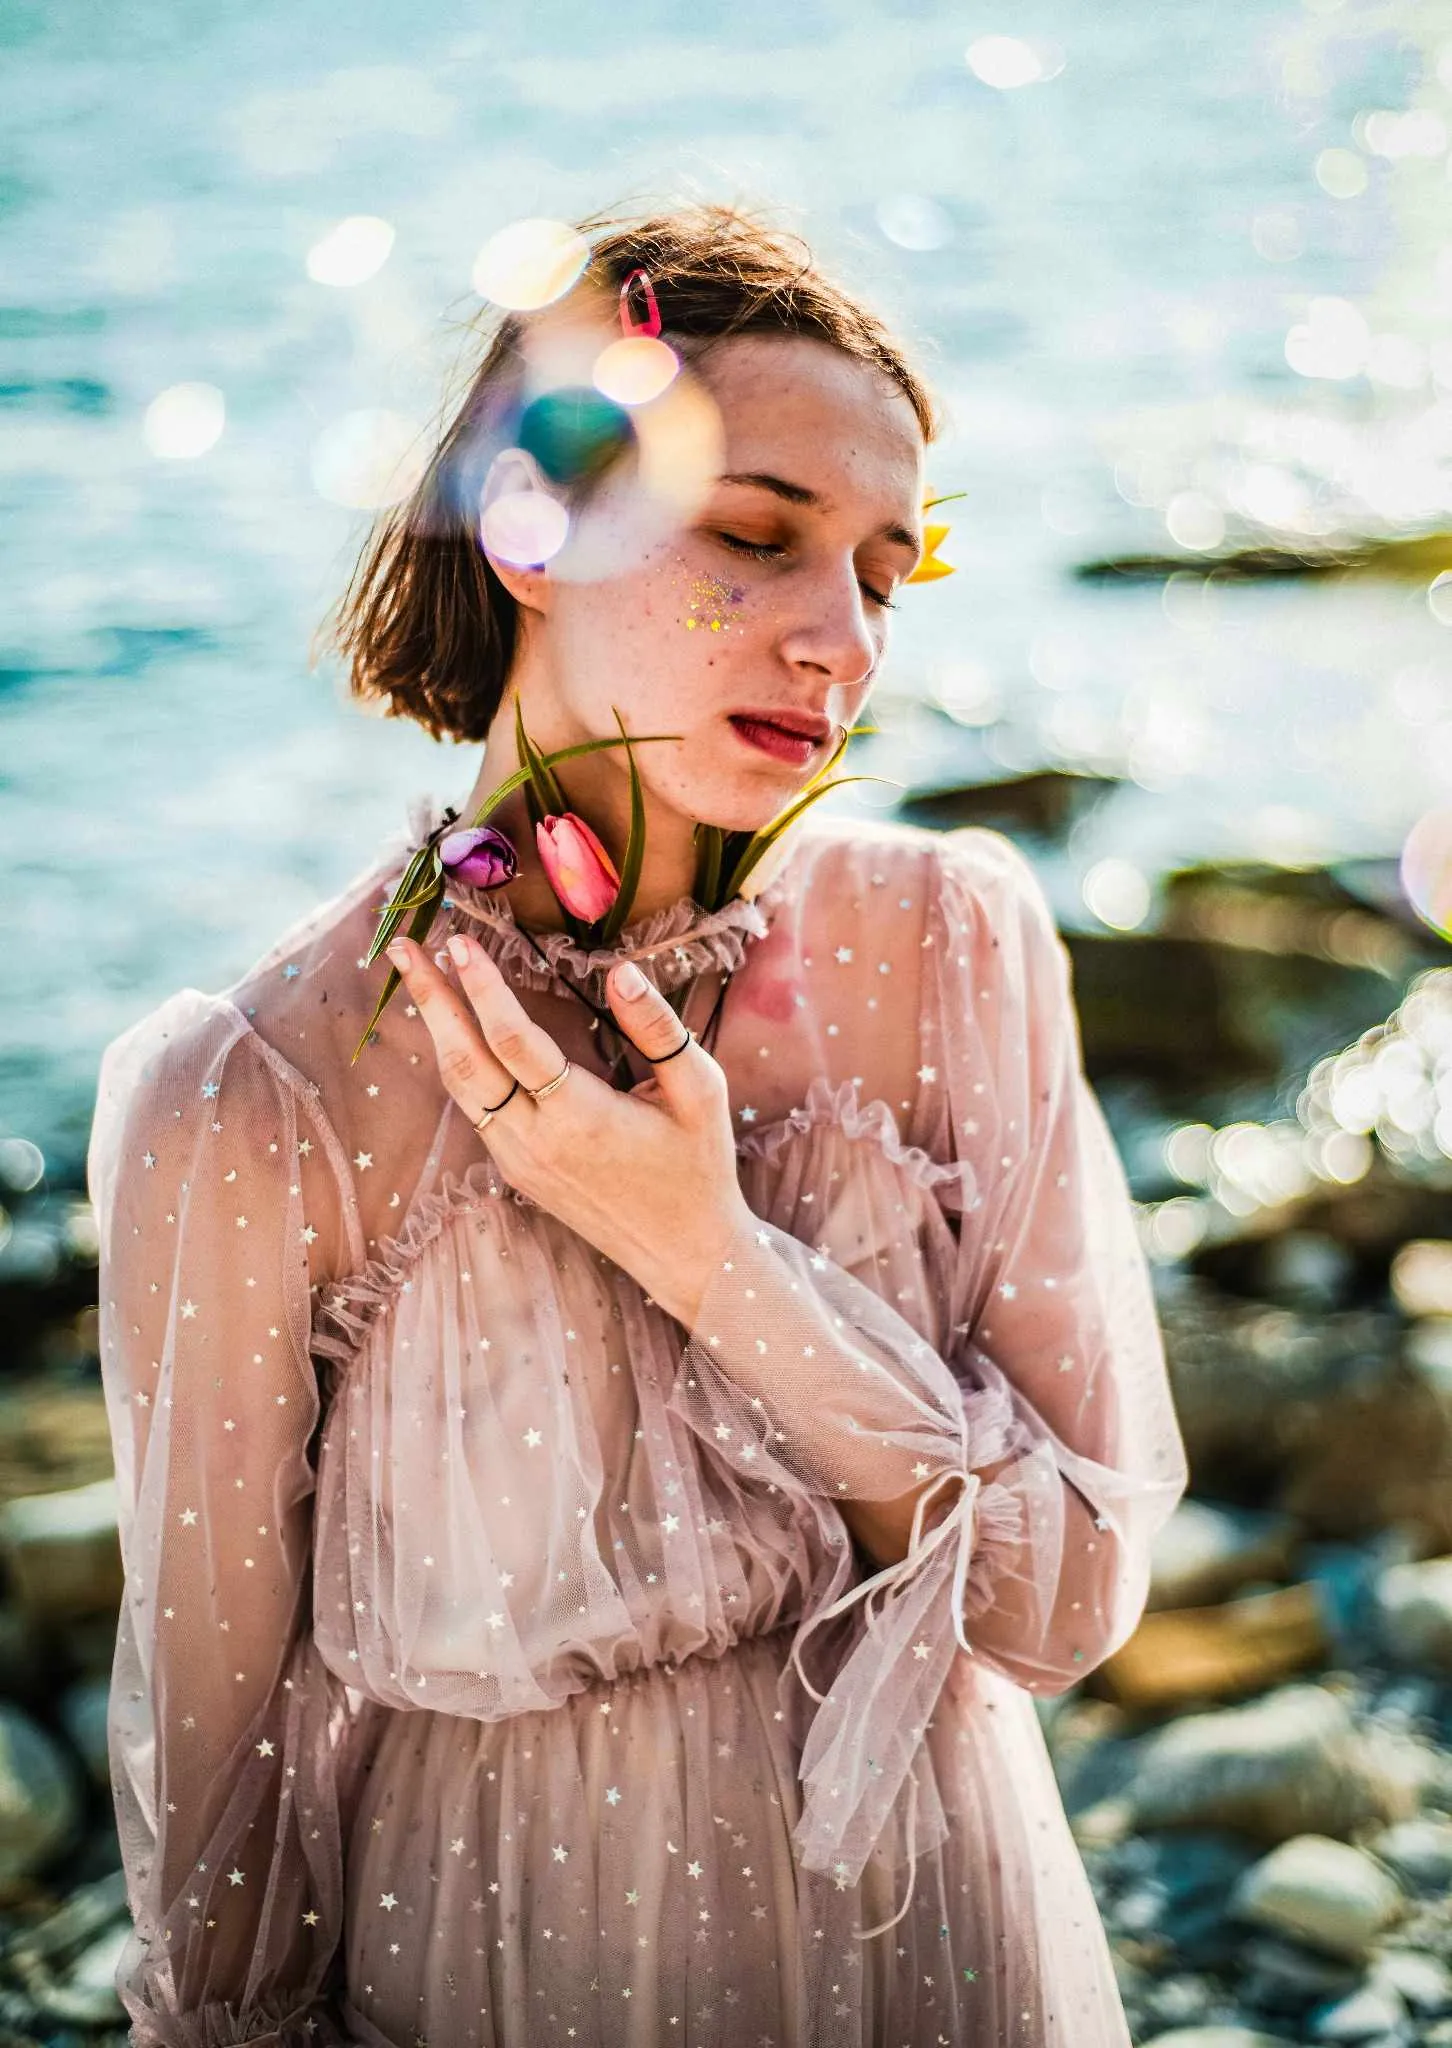
In our second outdoor portrait, the preset worked just as well. The colors in the clothing became much richer, and the subject stood out clearly from the background.
For outdoor portraits taken in natural light, the preset was almost always a "one-click" success.

2. Indoor Portraits & Lifestyle
Indoor shots captured under artificial lights gave us mixed results.
Because indoor lights are already yellow or orange, applying a warm cinematic preset can sometimes make skin tones look a bit too warm or orange. However, the preset did a wonderful job of adding a cool, moody feel to the dark areas of the room.
For example, in the indoor couch scene below, the preset turned a flat red dress into a deep, luxurious ruby red. The shadows on the leather couch and the background wall received a subtle, cool blue-green tint, which created a high-end look.
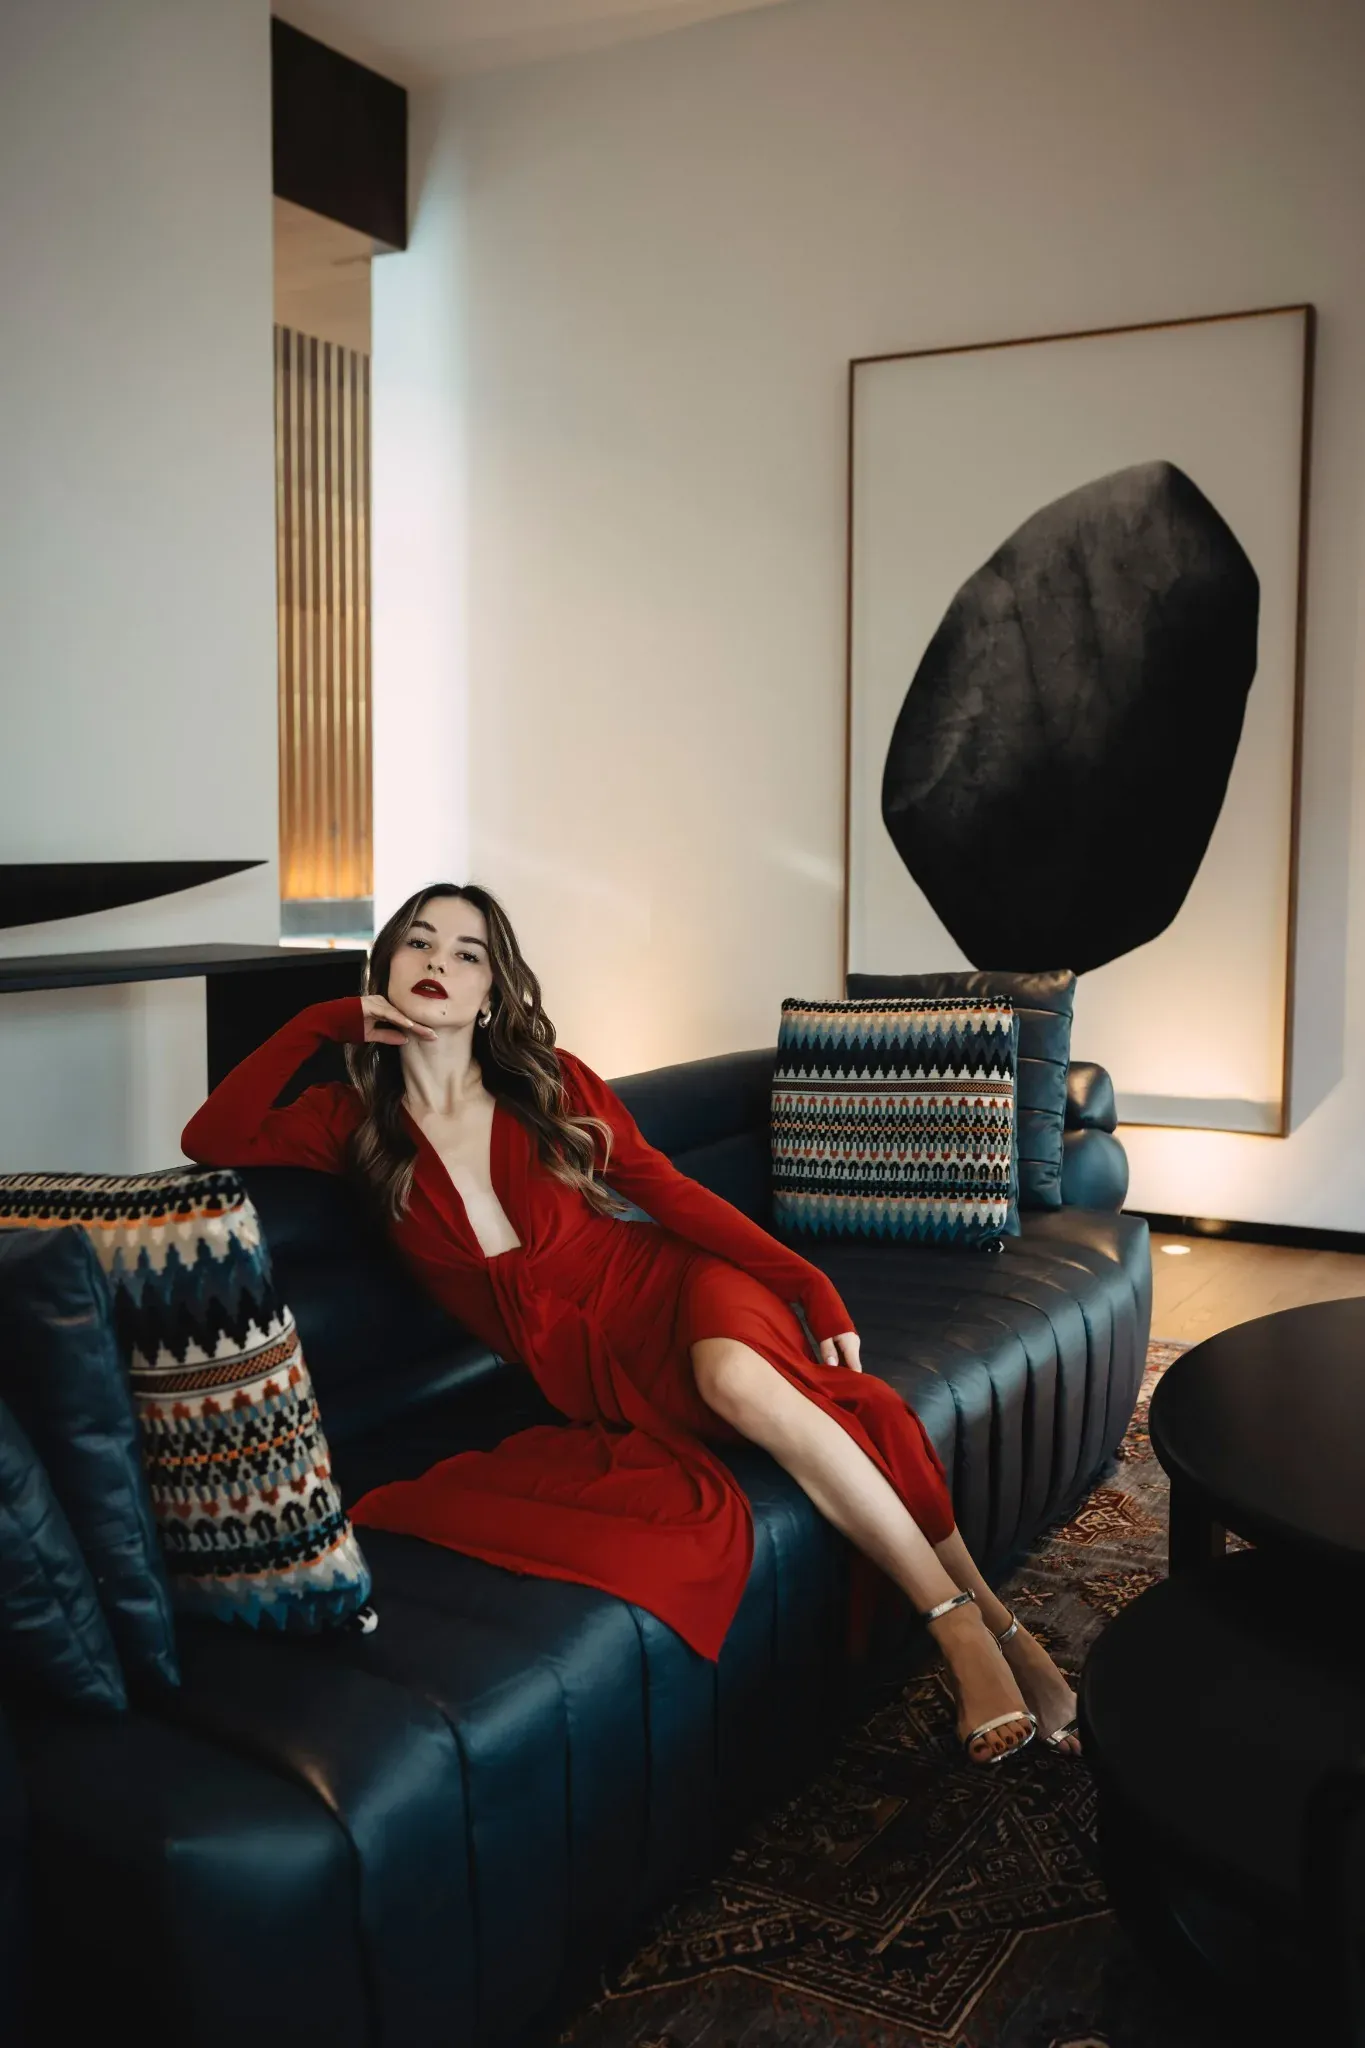
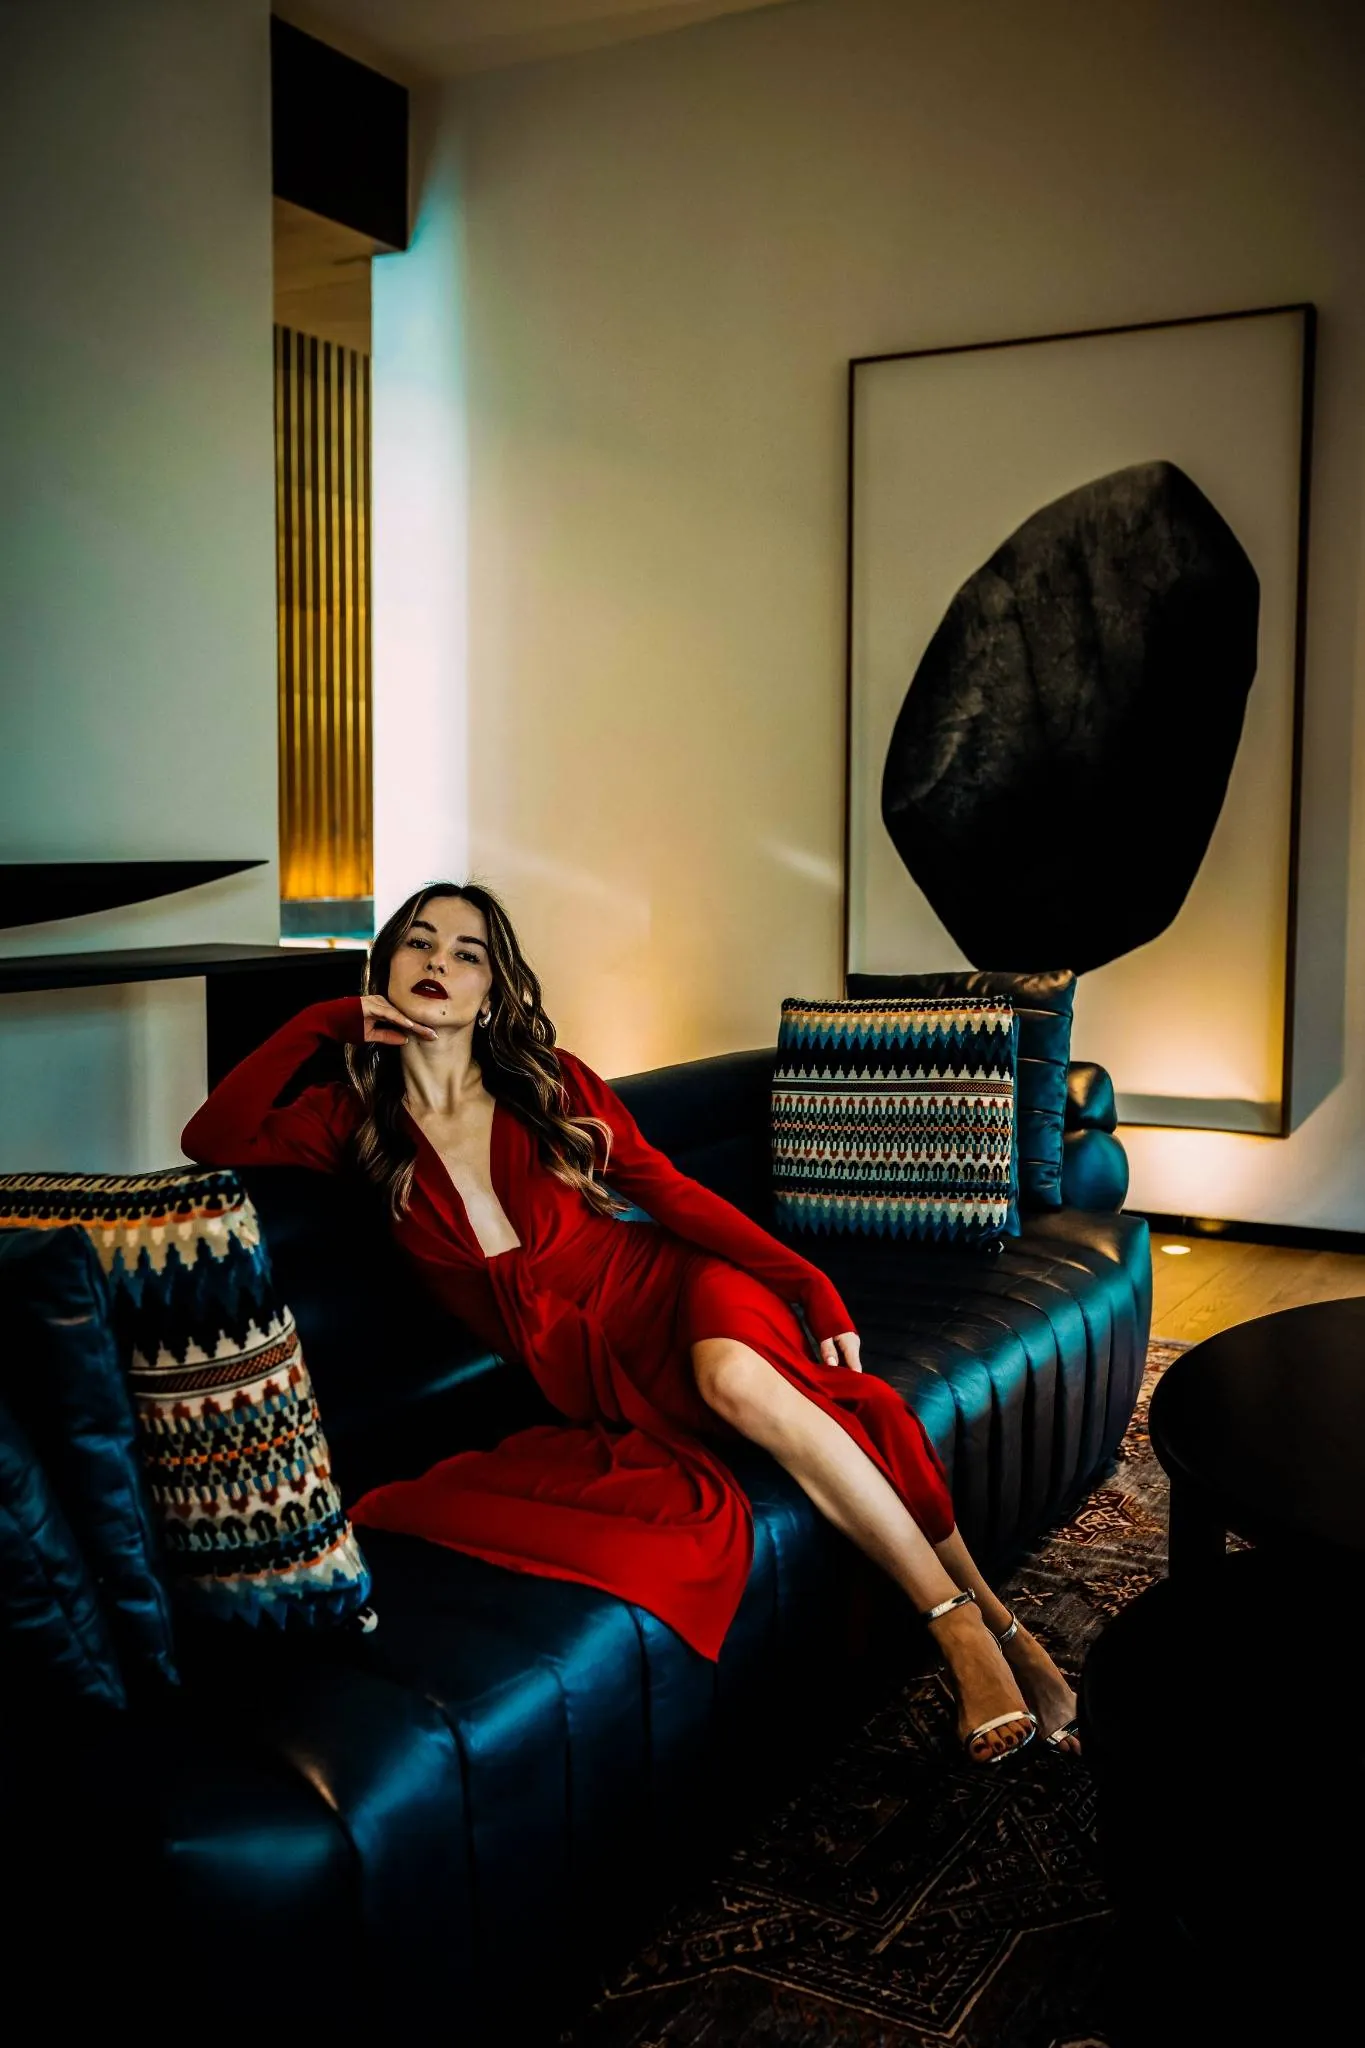
In the second indoor portrait, the lighting was dimmer. The preset made the image look clean and artistic, but it did make the scene slightly darker.
The Fix: When using this preset indoors, simply nudge the Temperature slider slightly to the left (toward blue) to cool down the yellow skin tones, and increase the Exposure slider slightly if the room looks too dark.
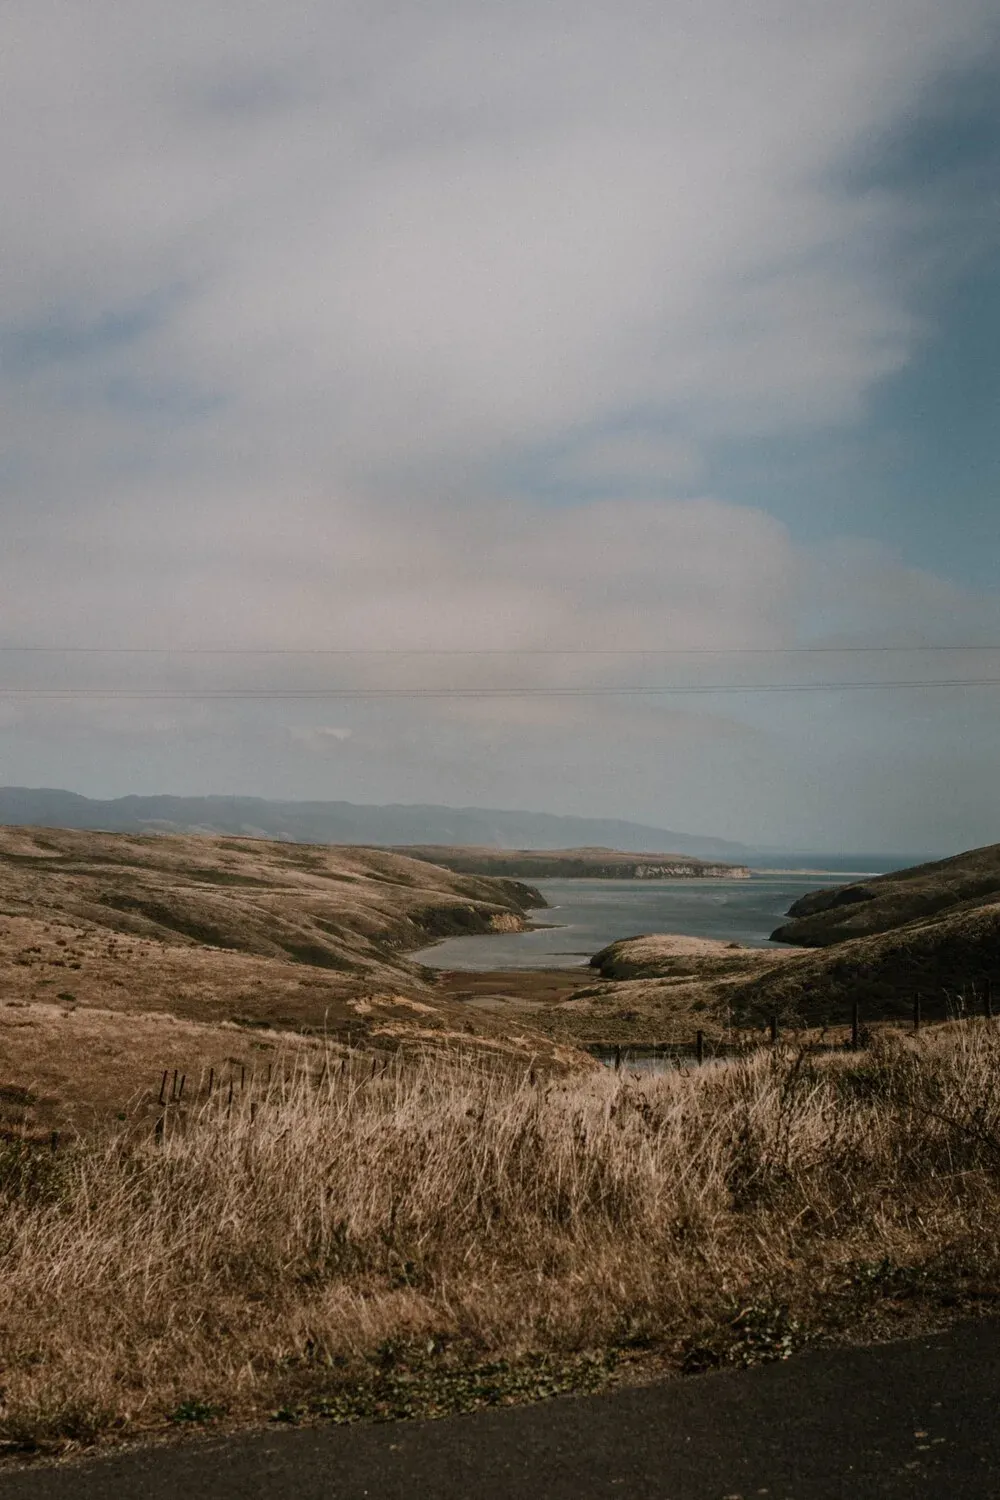
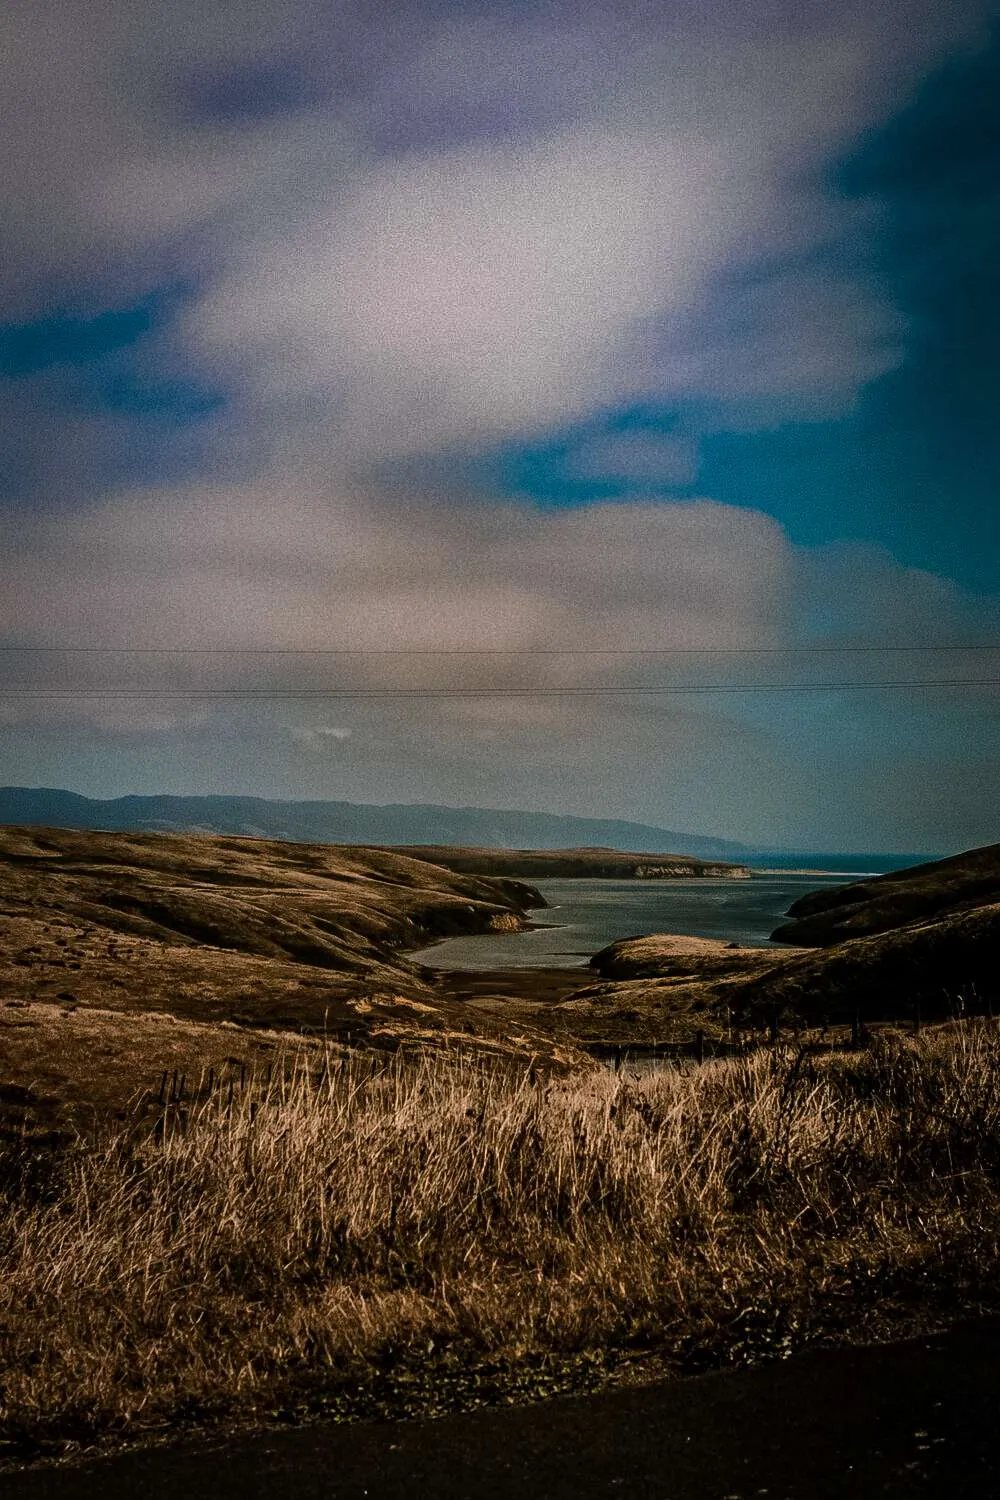
3. Landscape & Nature Photography
Landscapes are notoriously difficult for presets because the light changes constantly. However, our cinematic preset handled them surprisingly well.
In the mountain landscape below, the original image was flat and missing definition. Applying the preset made the mountains stand out with sharp contrast. The light blues in the sky shifted into a deeper, slightly teal color, making the clouds pop.
In our green nature test, the preset shifted the bright, distracting neon greens into a more mature, olive-green color. This gave the grass and hills a clean, professional aesthetic instead of looking like a basic smartphone photo.
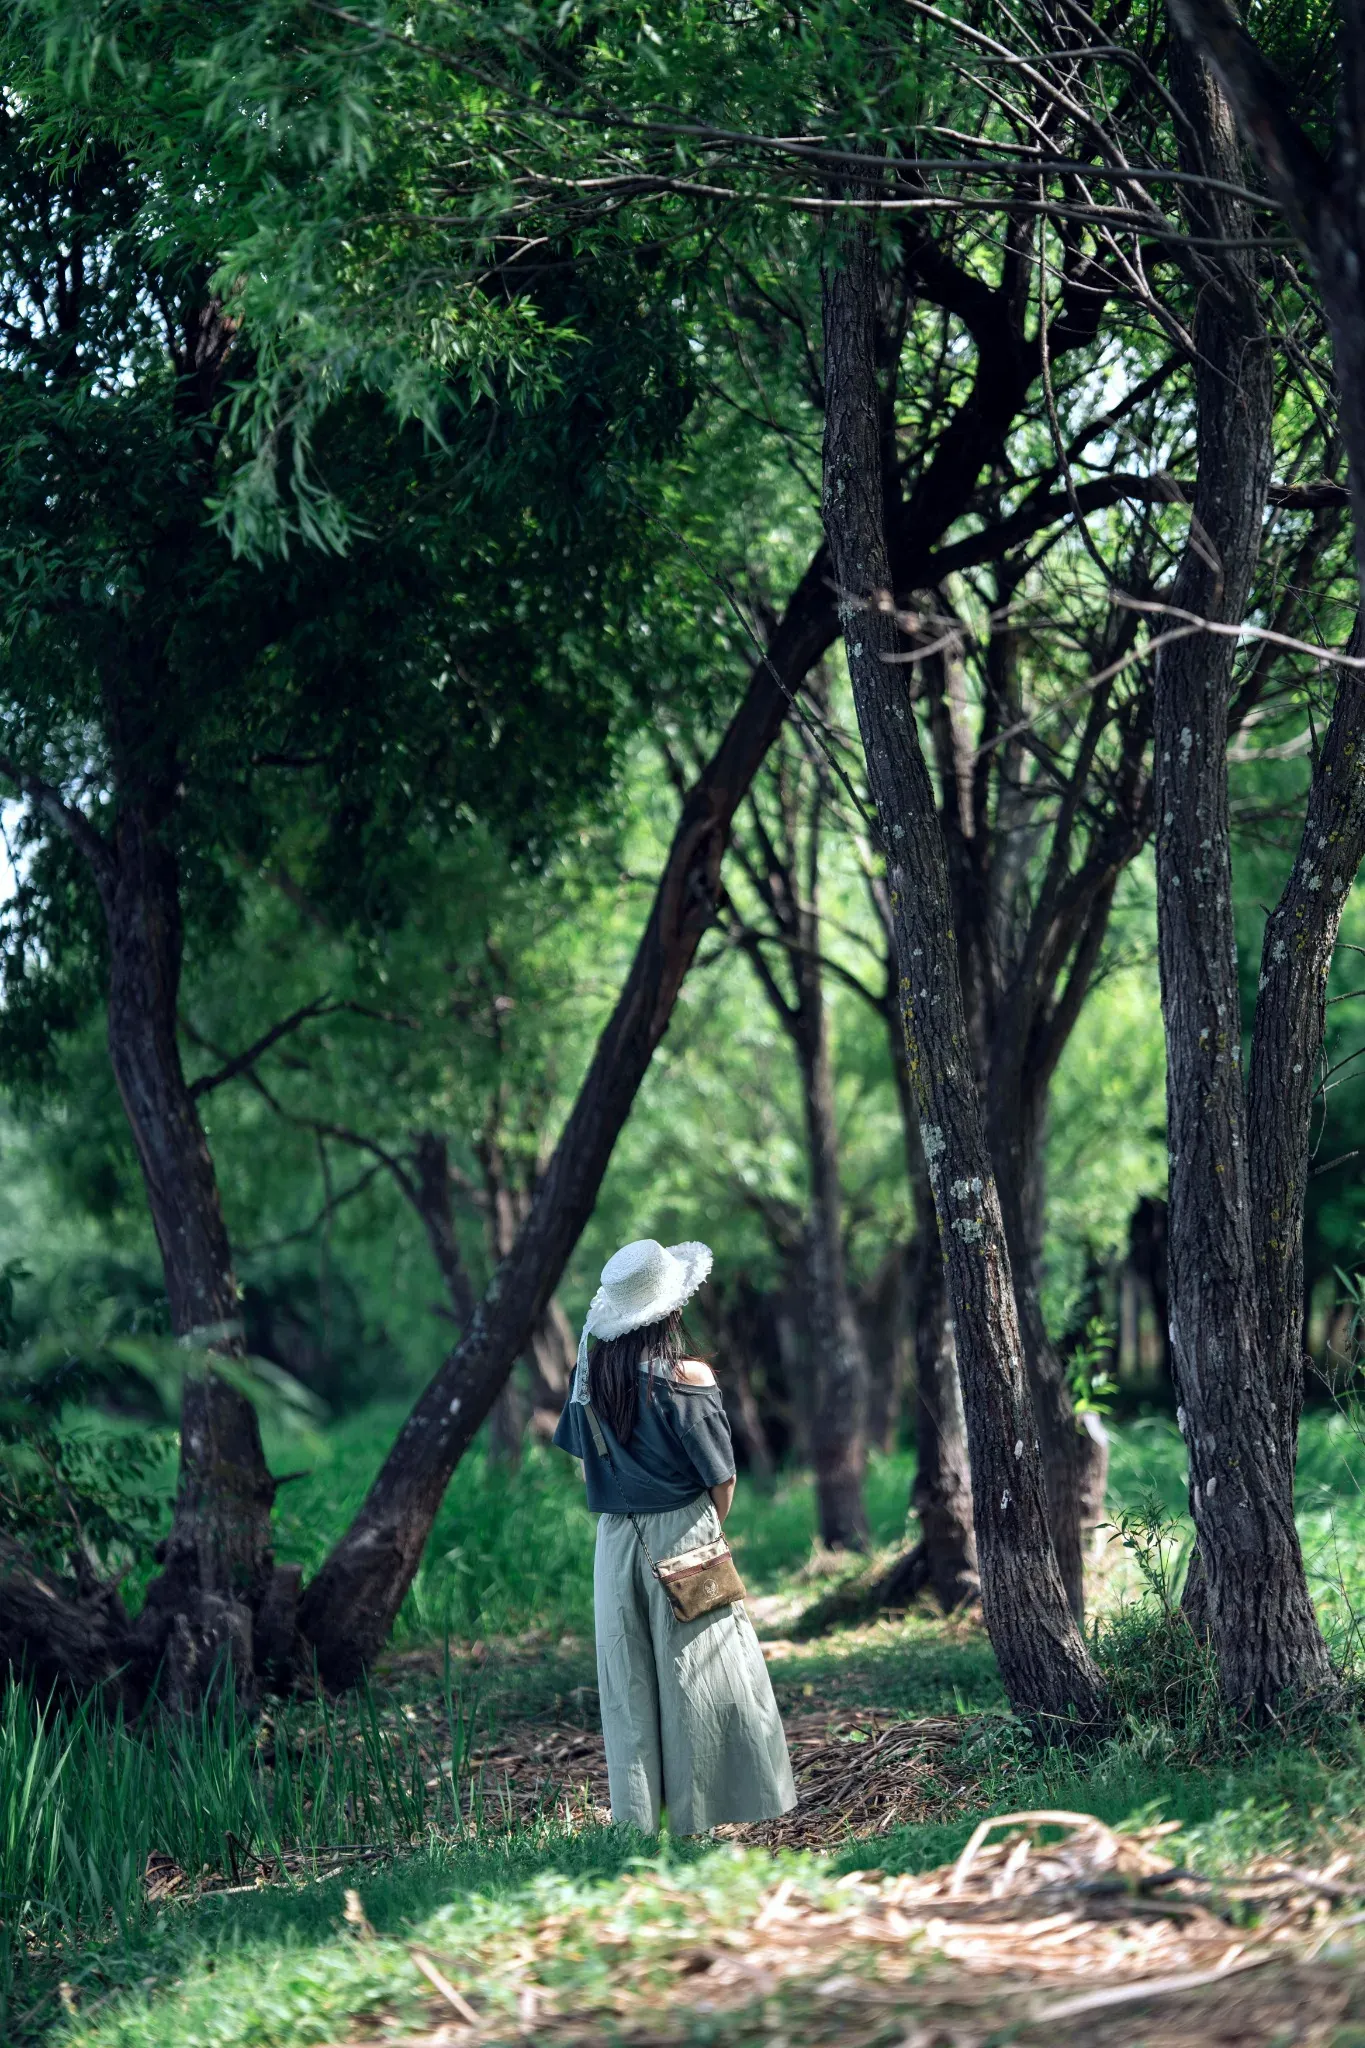
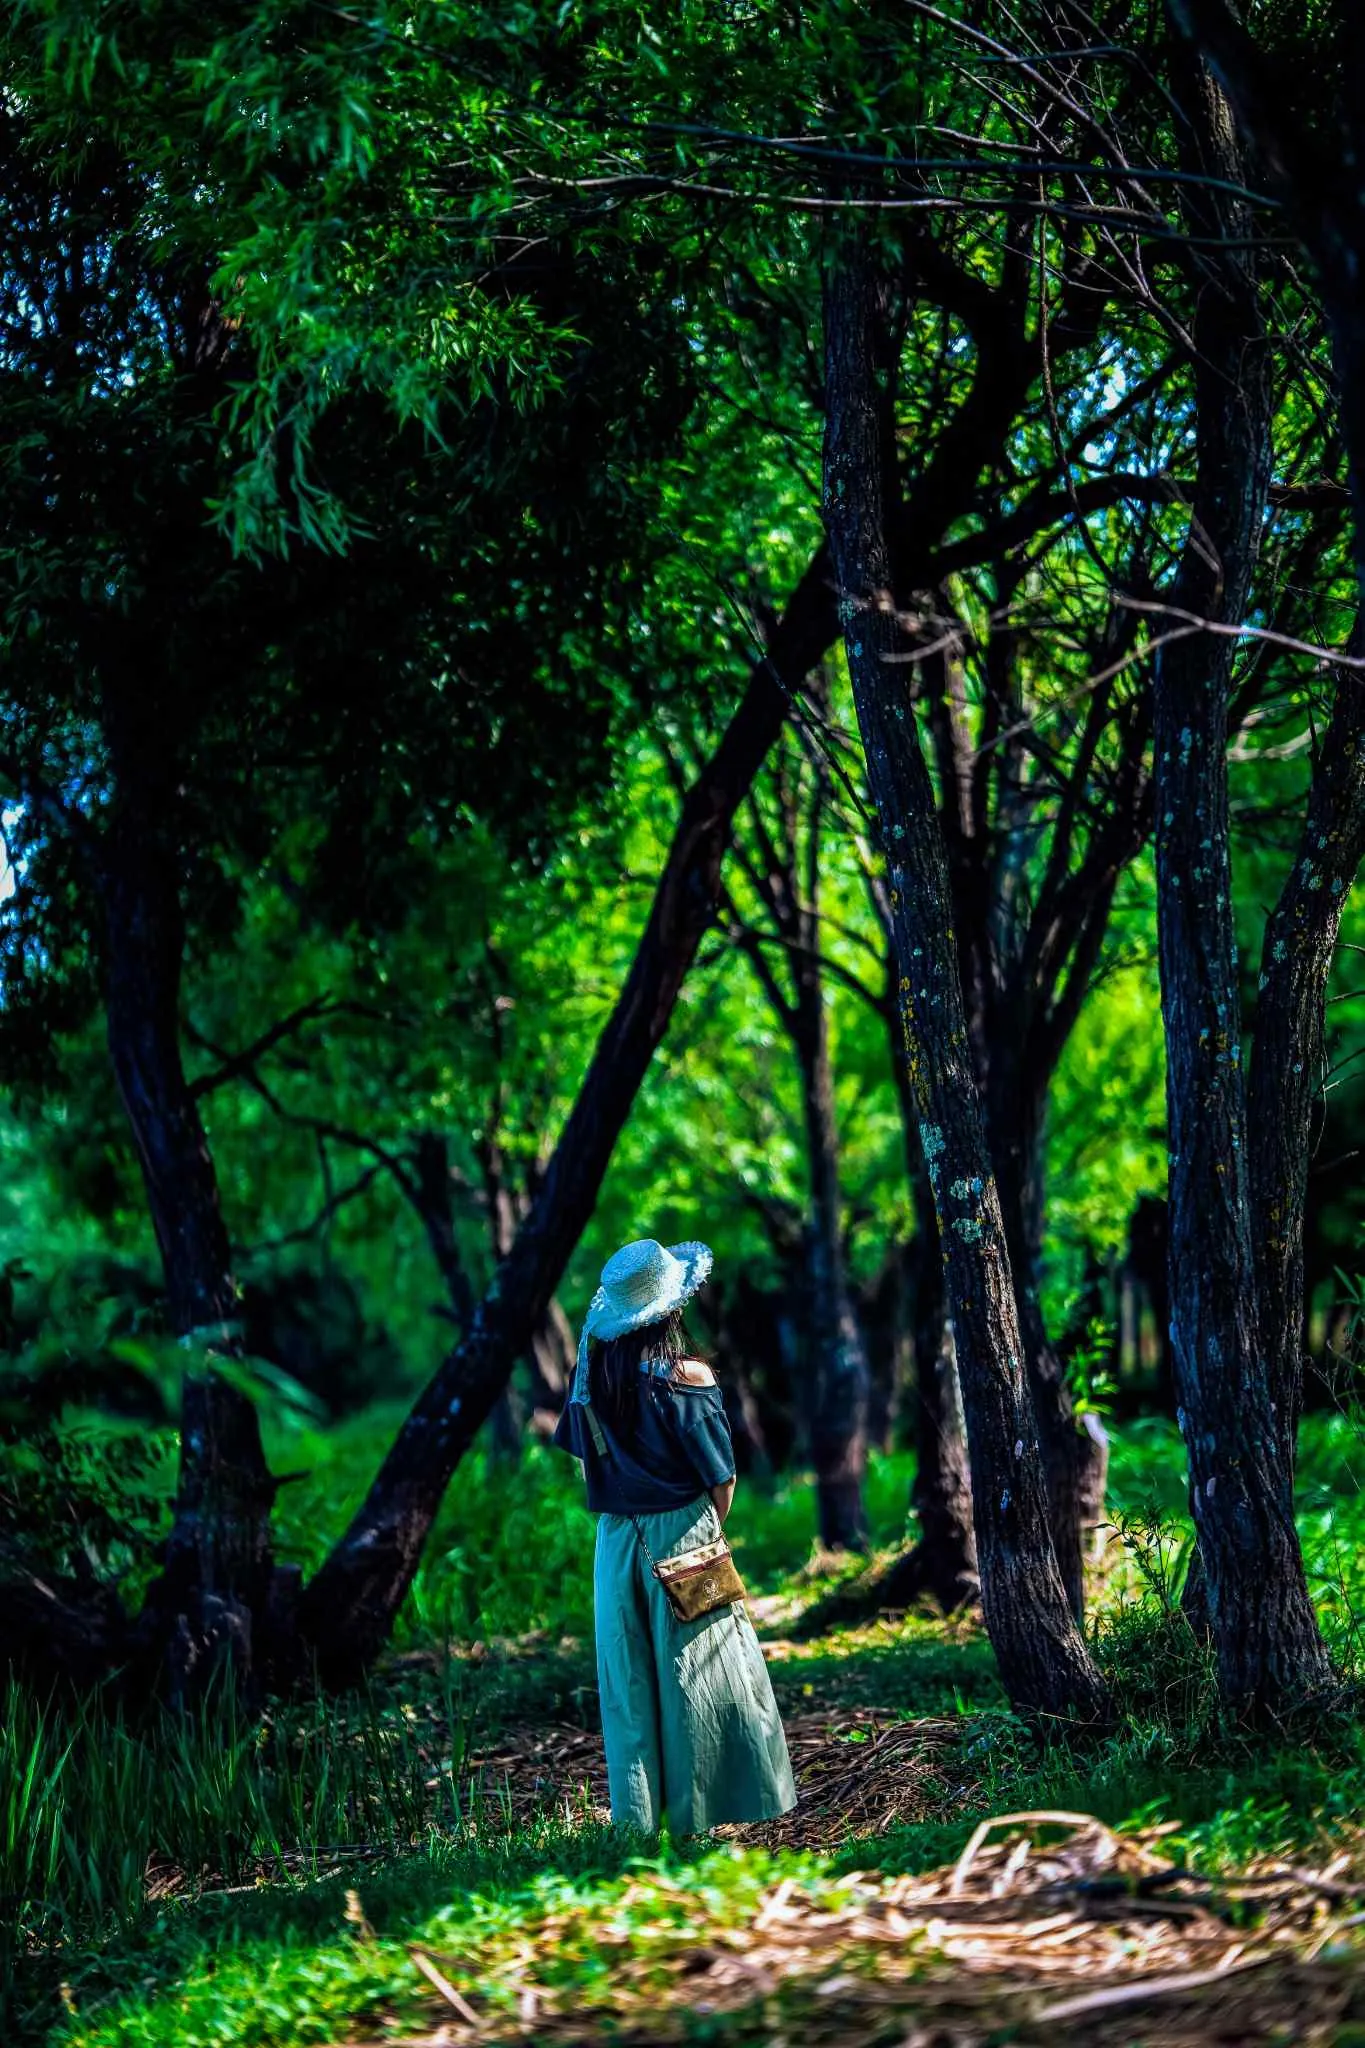
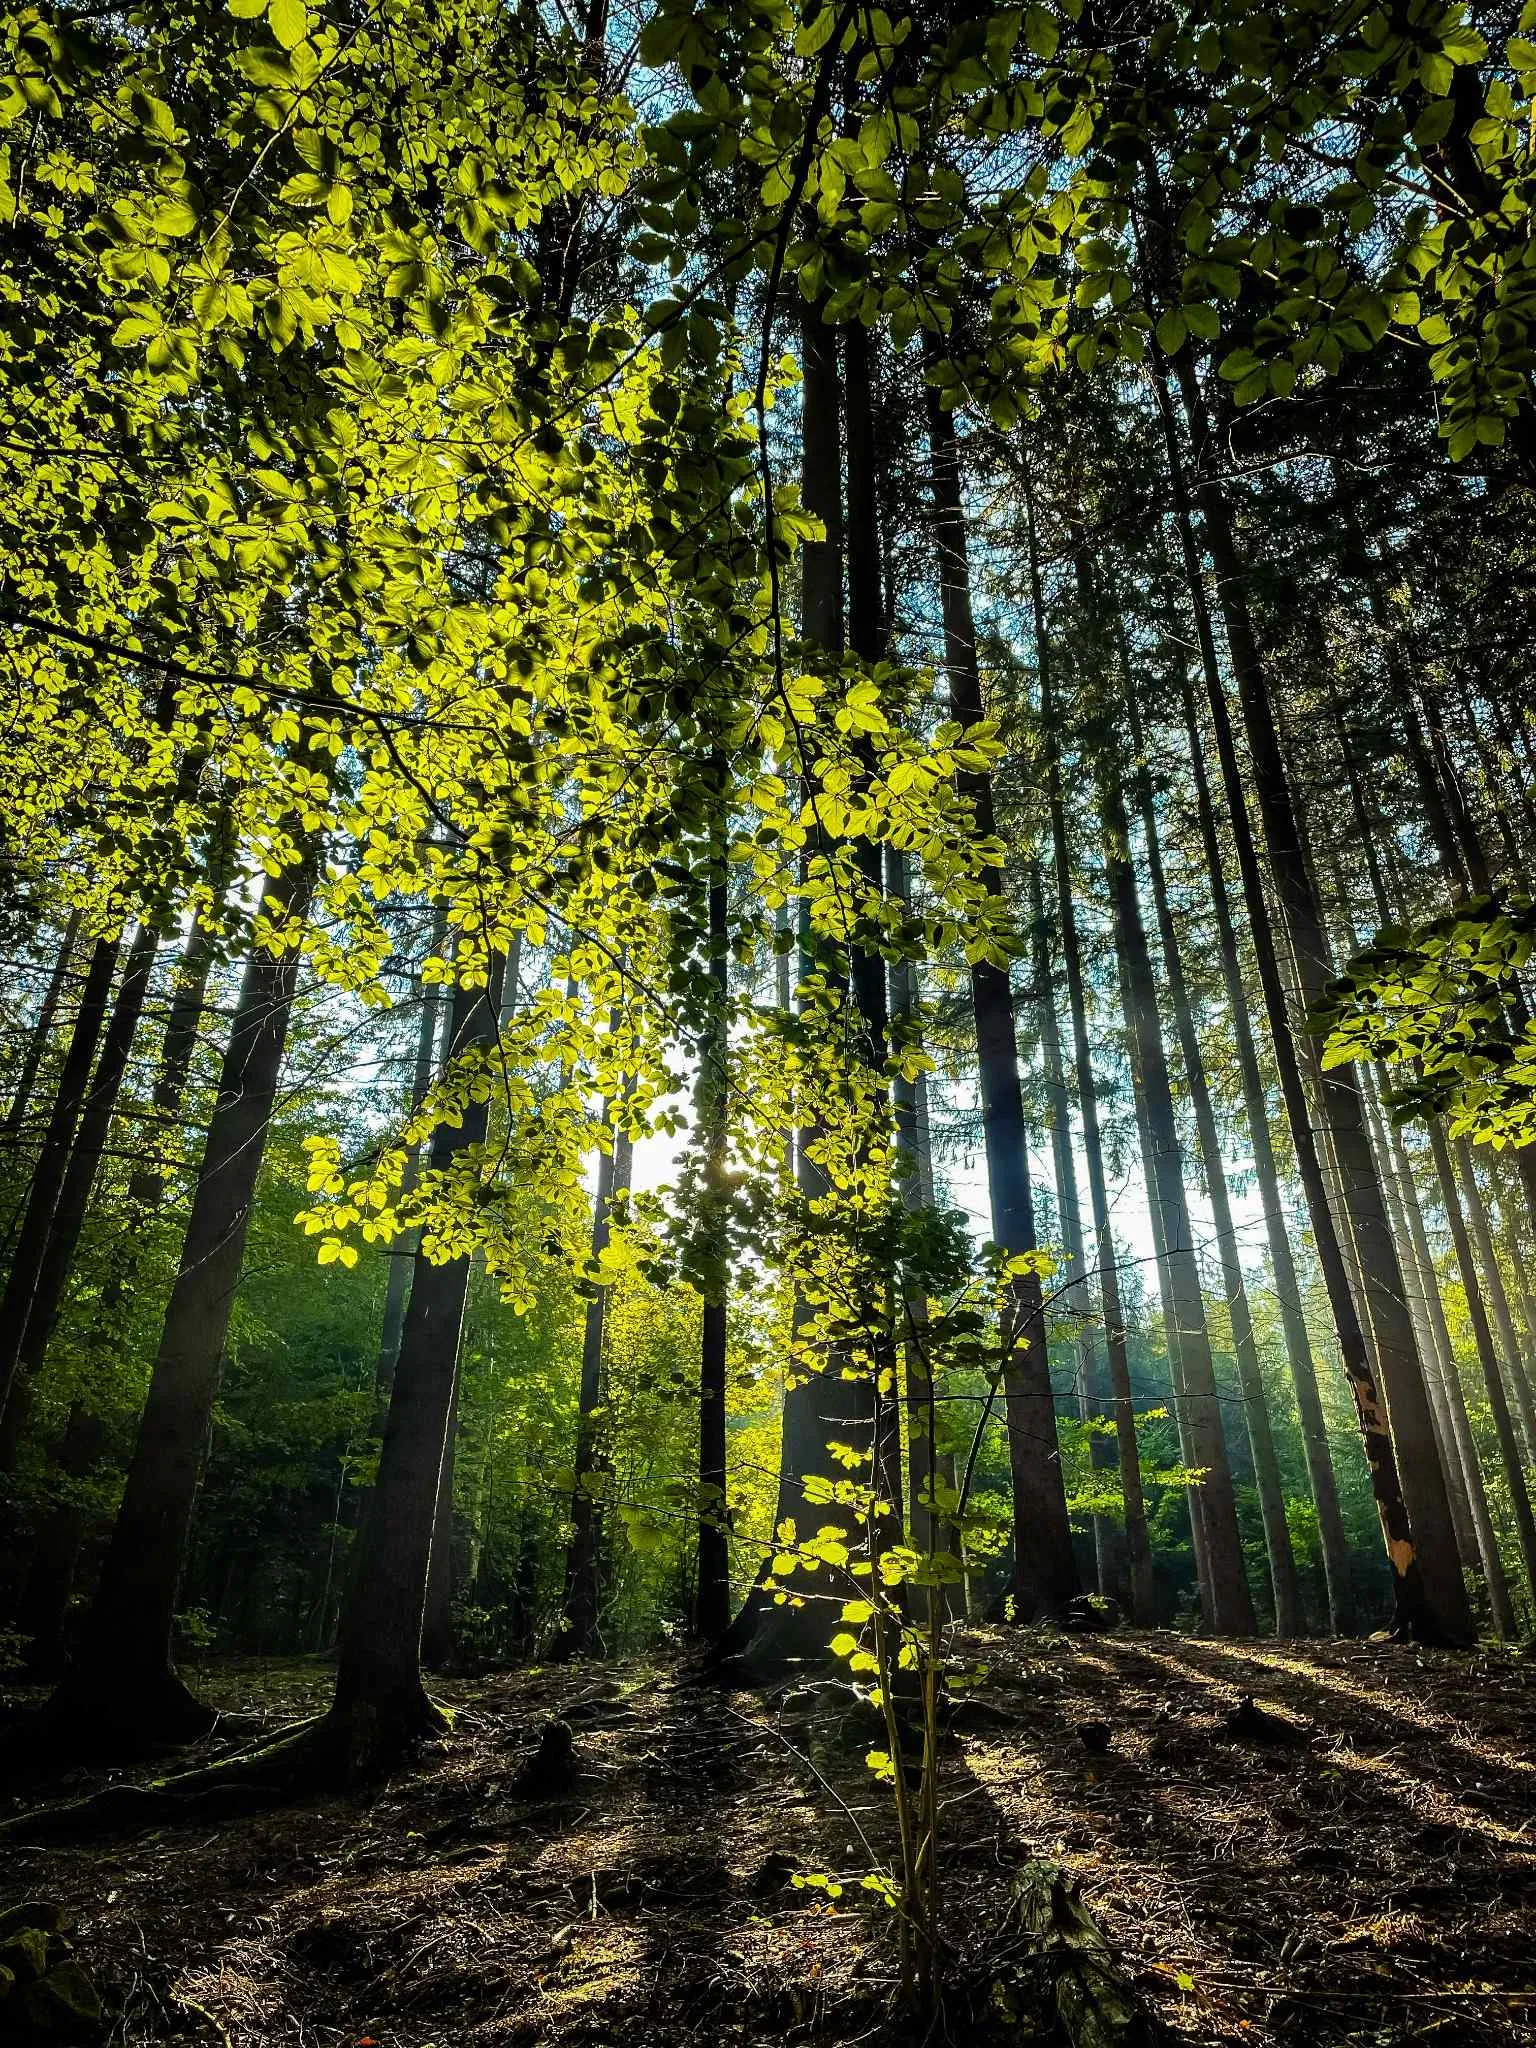
4. Forest Photography
Forest photos look incredible with this preset, but they require a little care.
In the forest scene below, the sun was shining through the trees. The original image had bright green leaves that looked slightly harsh. The preset turned the green leaves into a beautifully structured, warm golden-green. The background trees got a deep blue-gray cast, creating a beautiful contrast between the warm leaves in the front and the cool woods in the back.
The Critique: Because the preset deepens dark areas to create contrast, some of the dark tree trunks became a bit too dark. If you edit forest photos, you may want to scroll down to the Shadows slider in Lightroom and increase it slightly (+15 to +30) to bring back details in the tree bark.

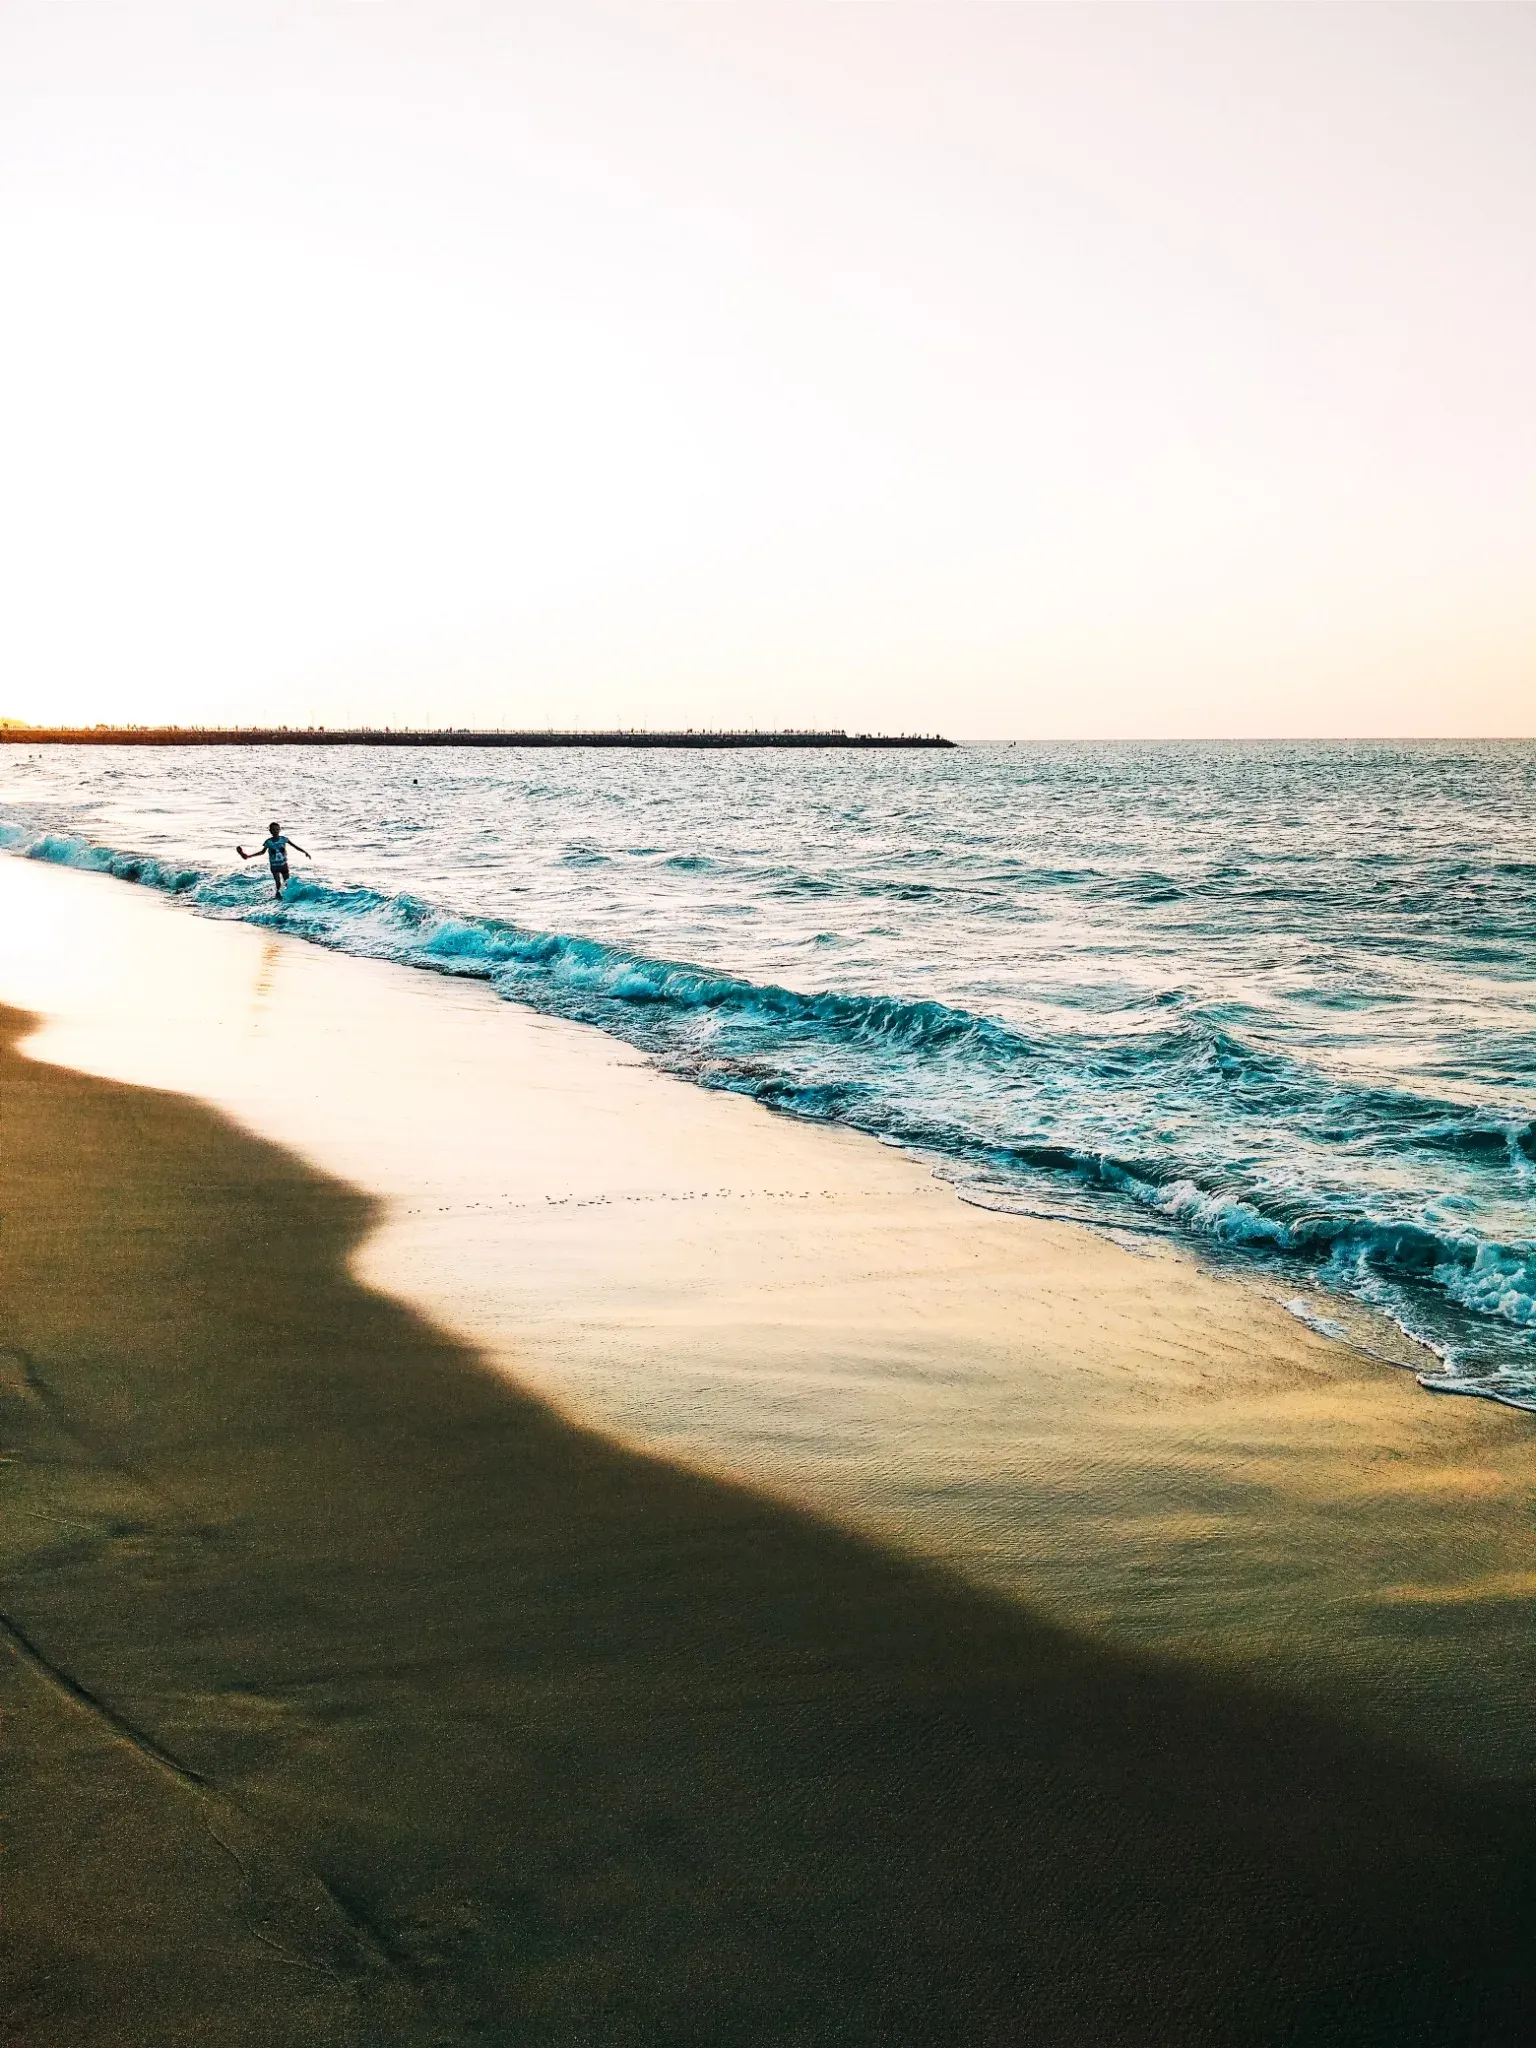
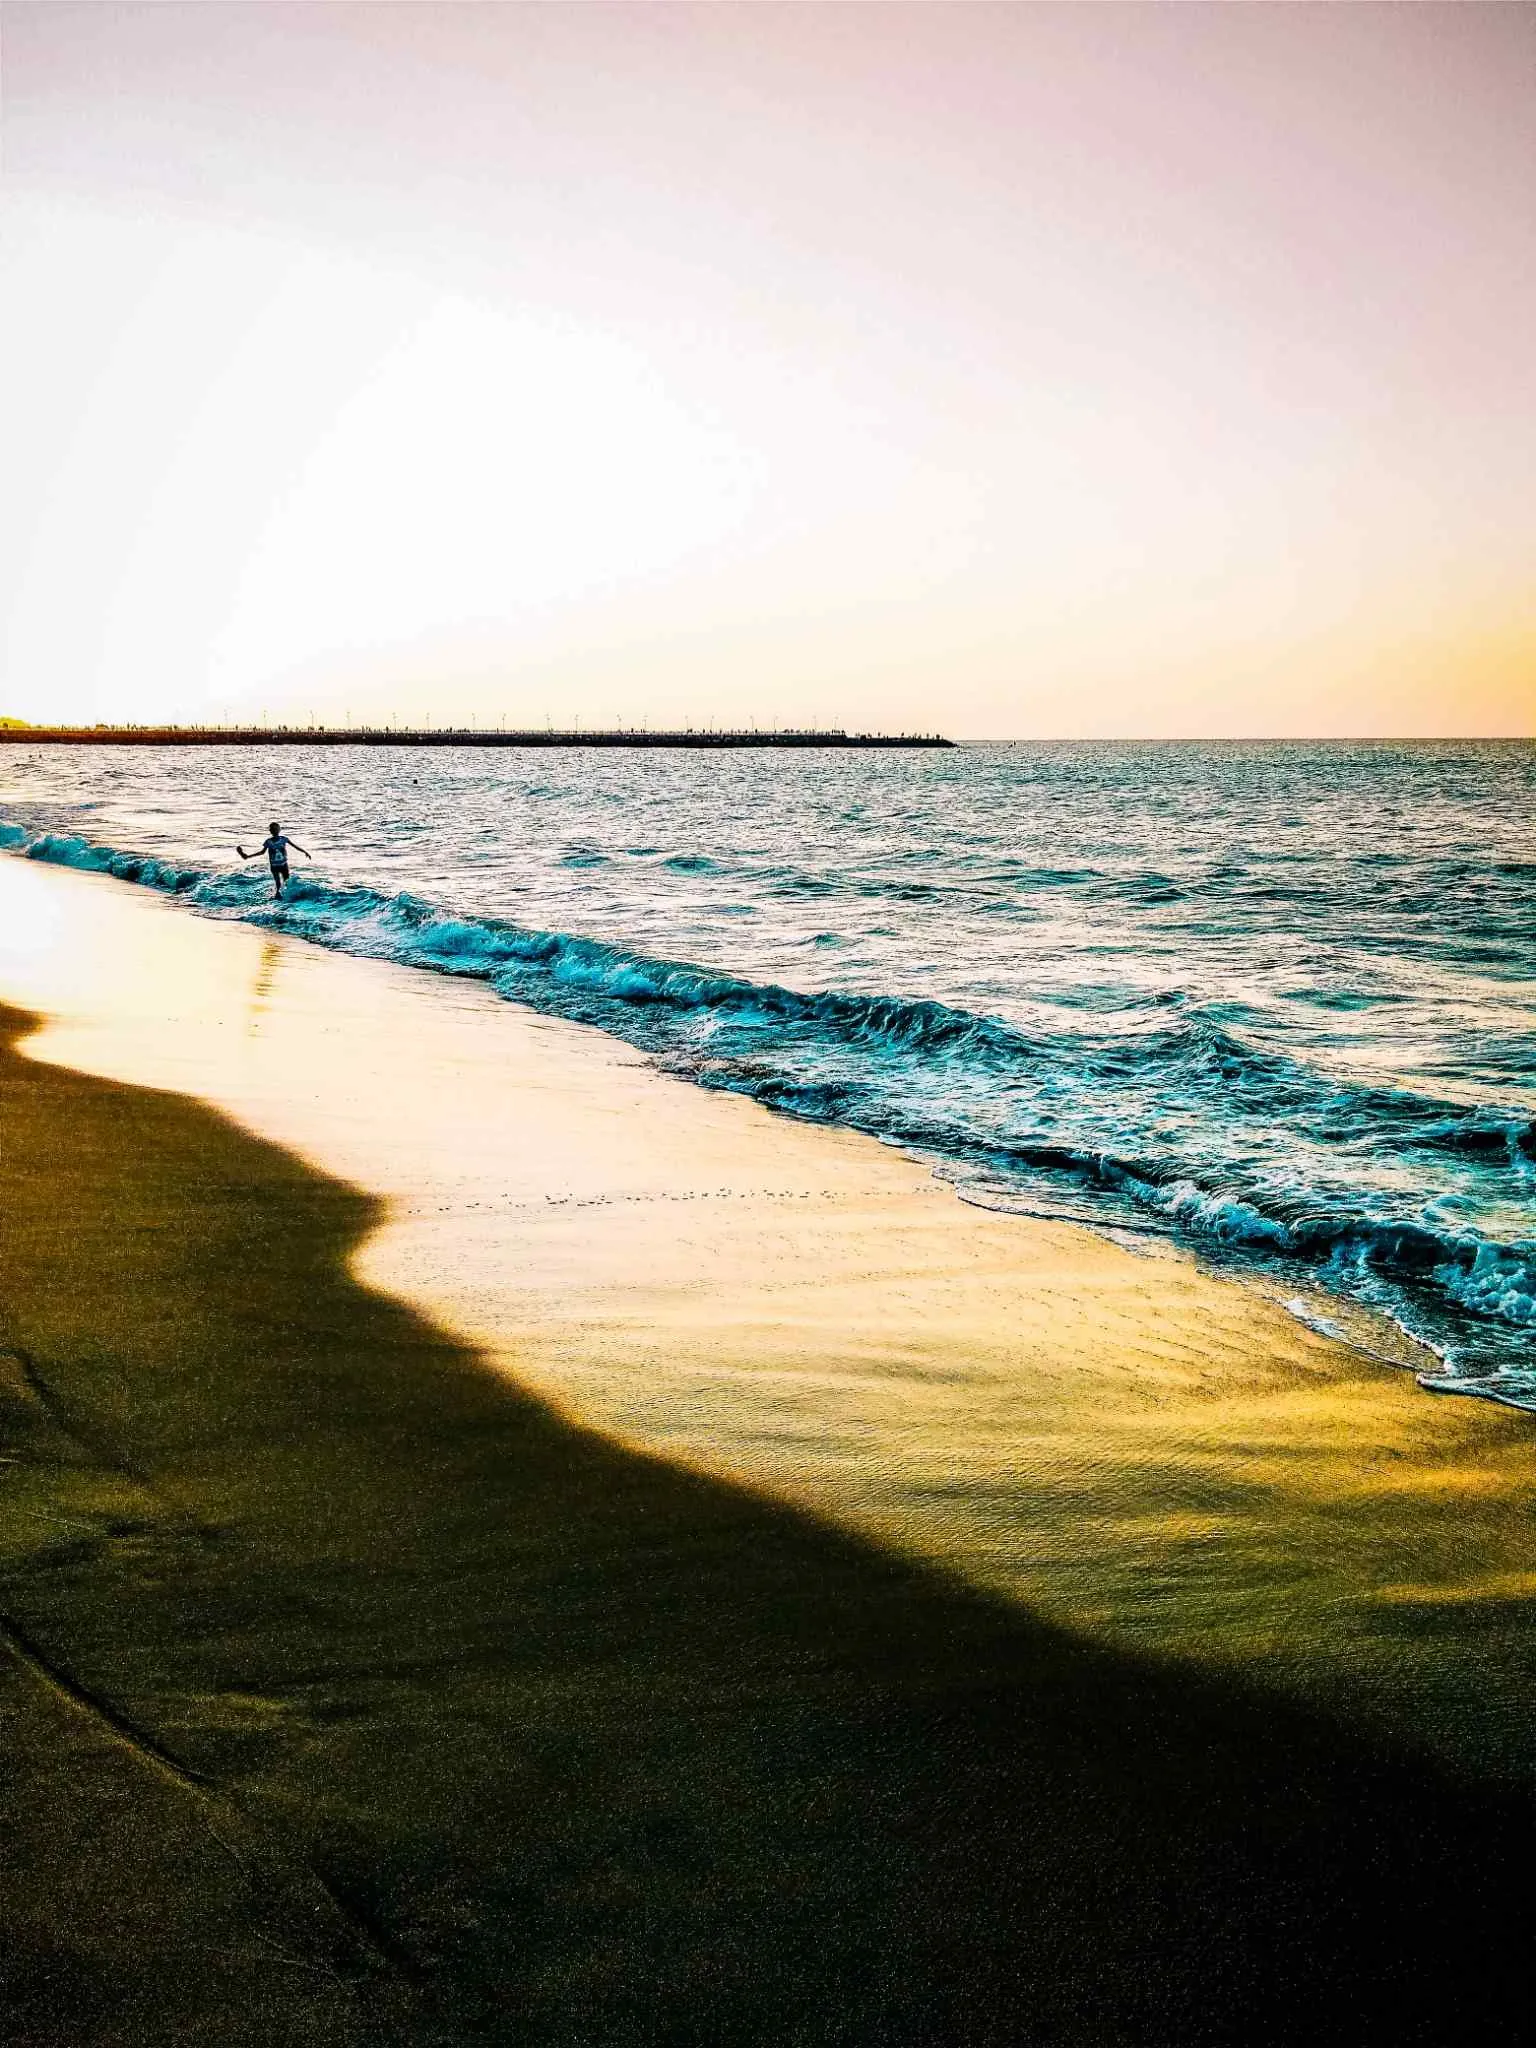
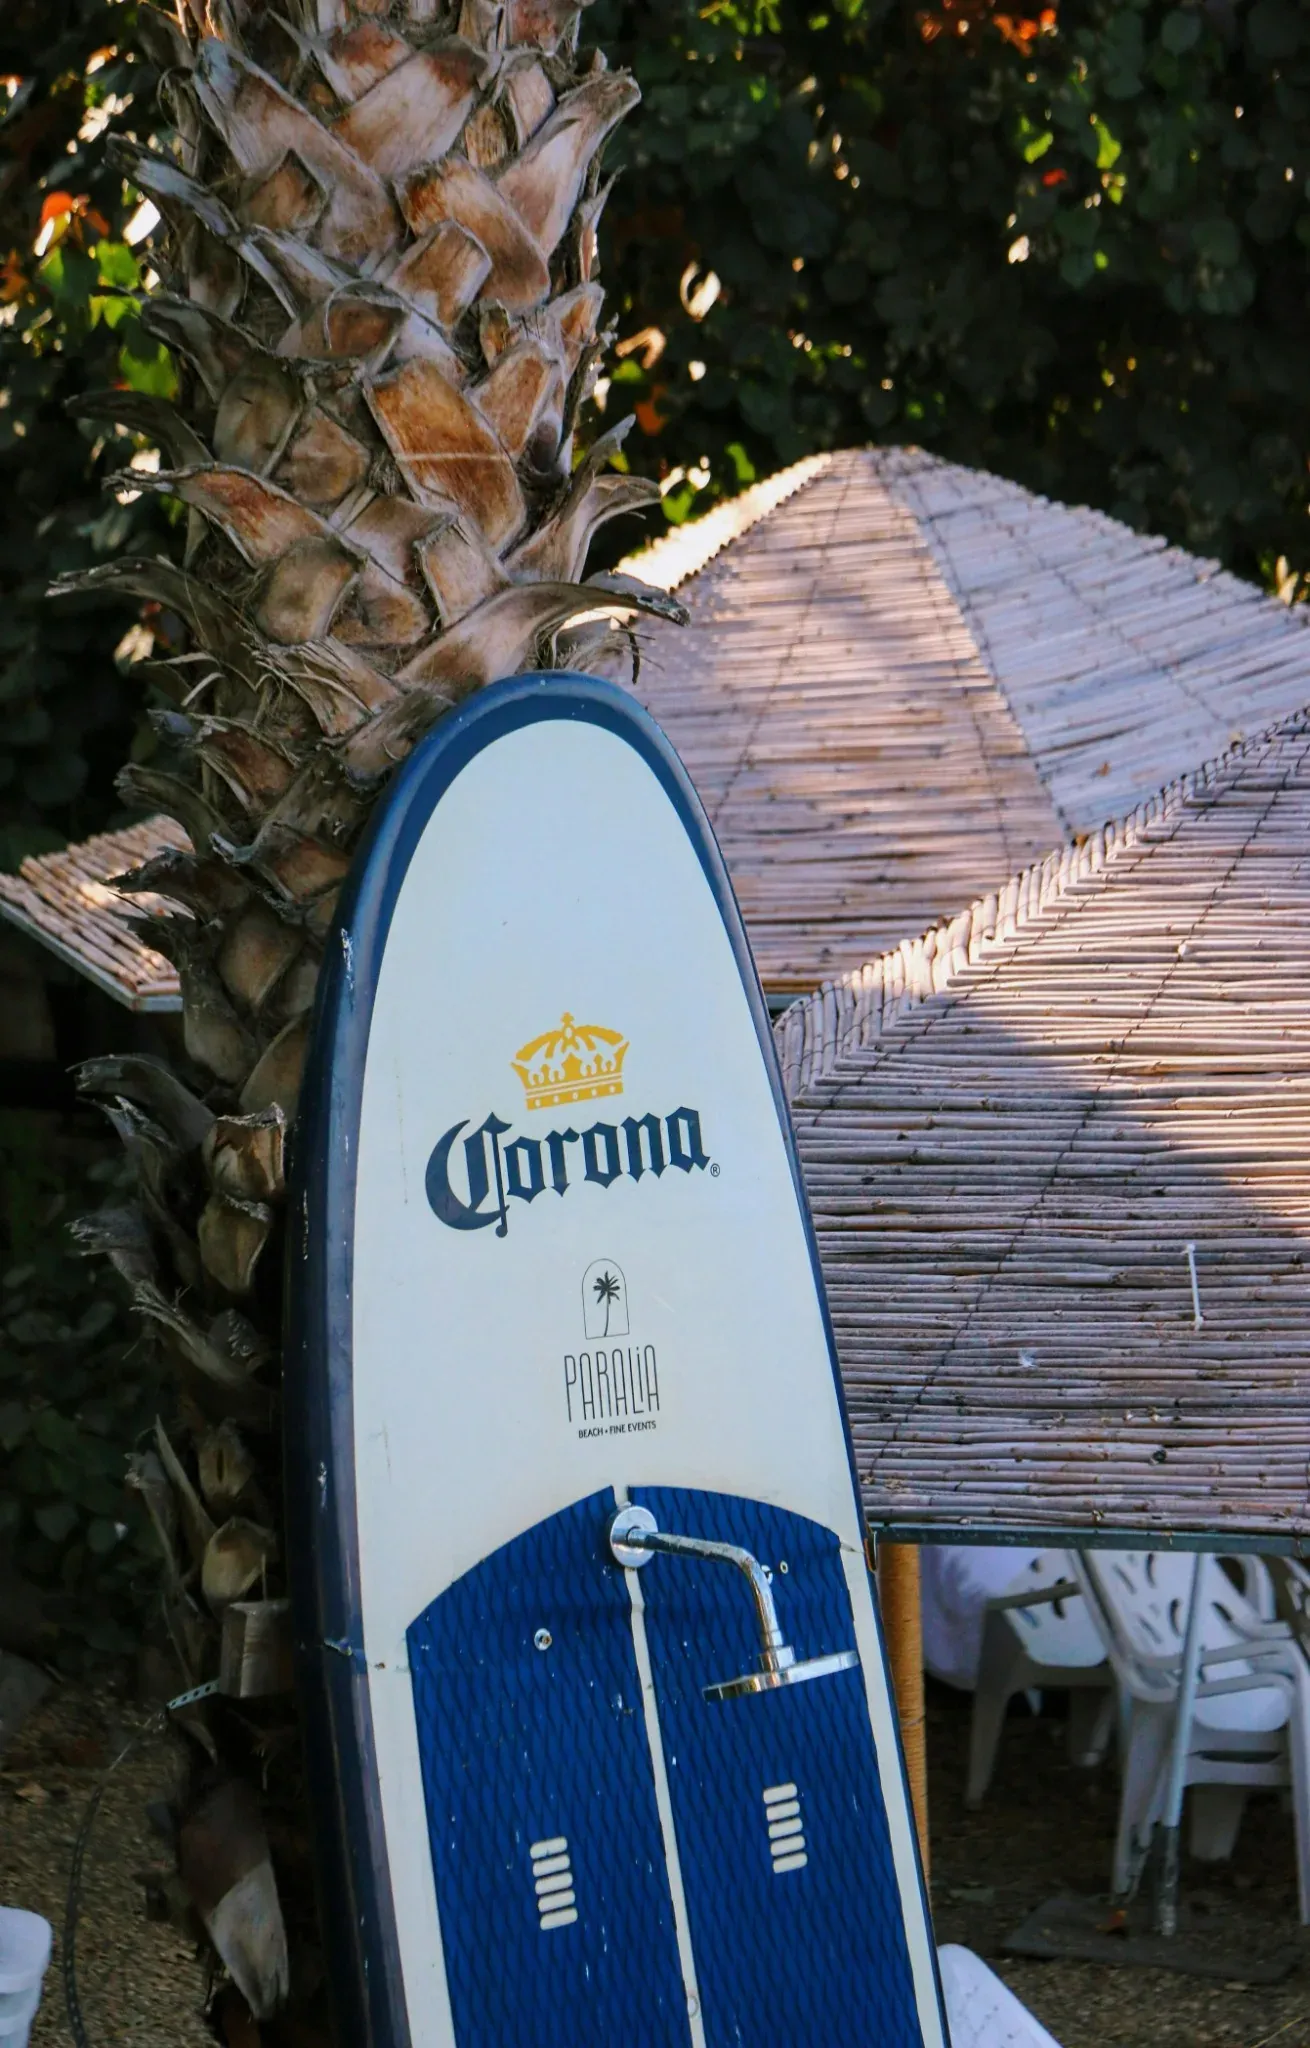
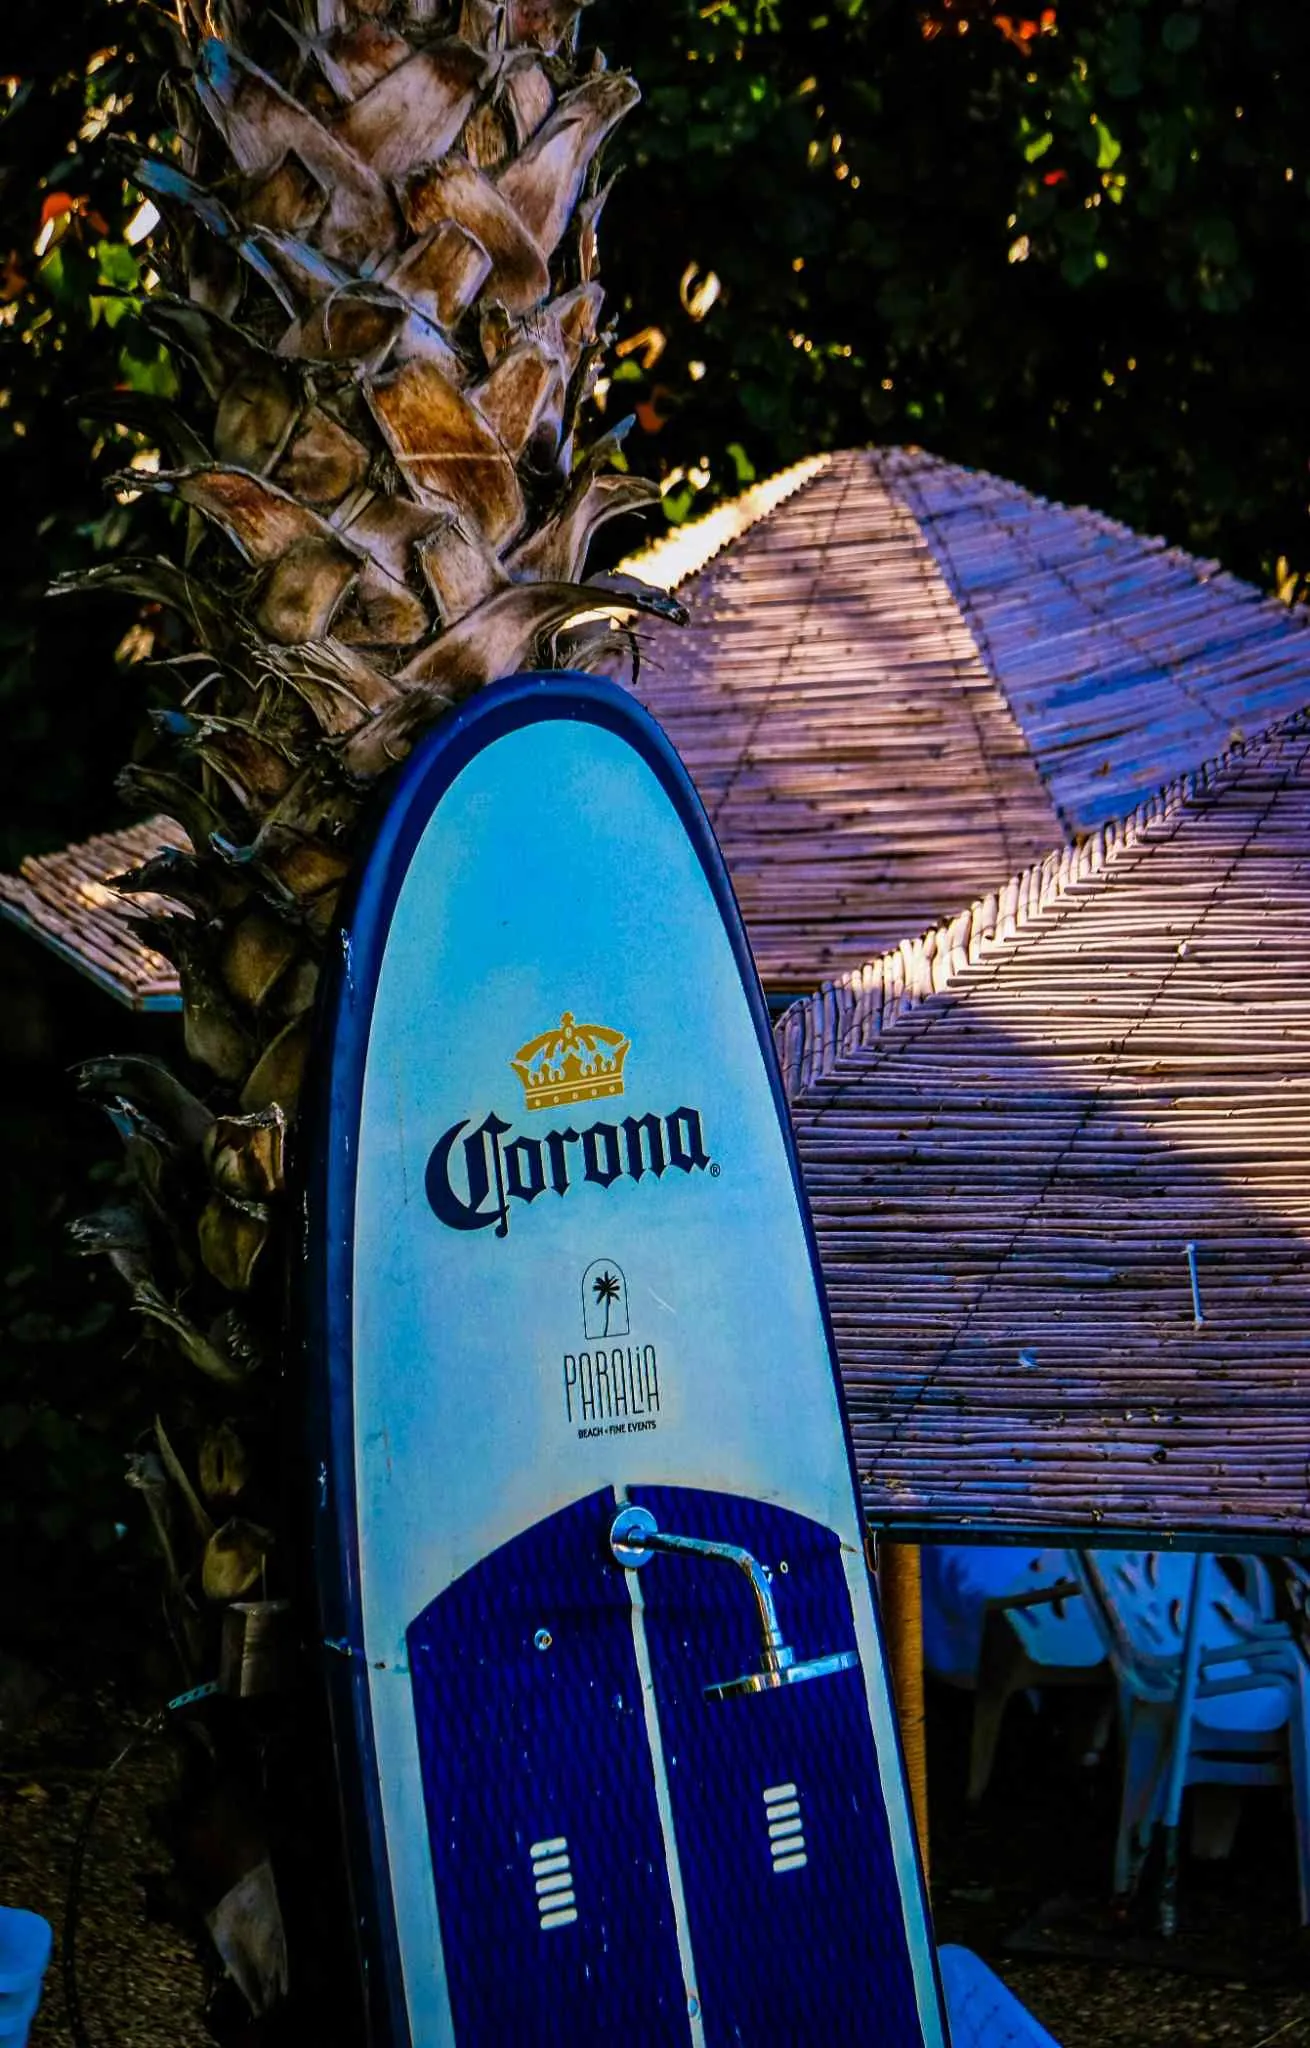
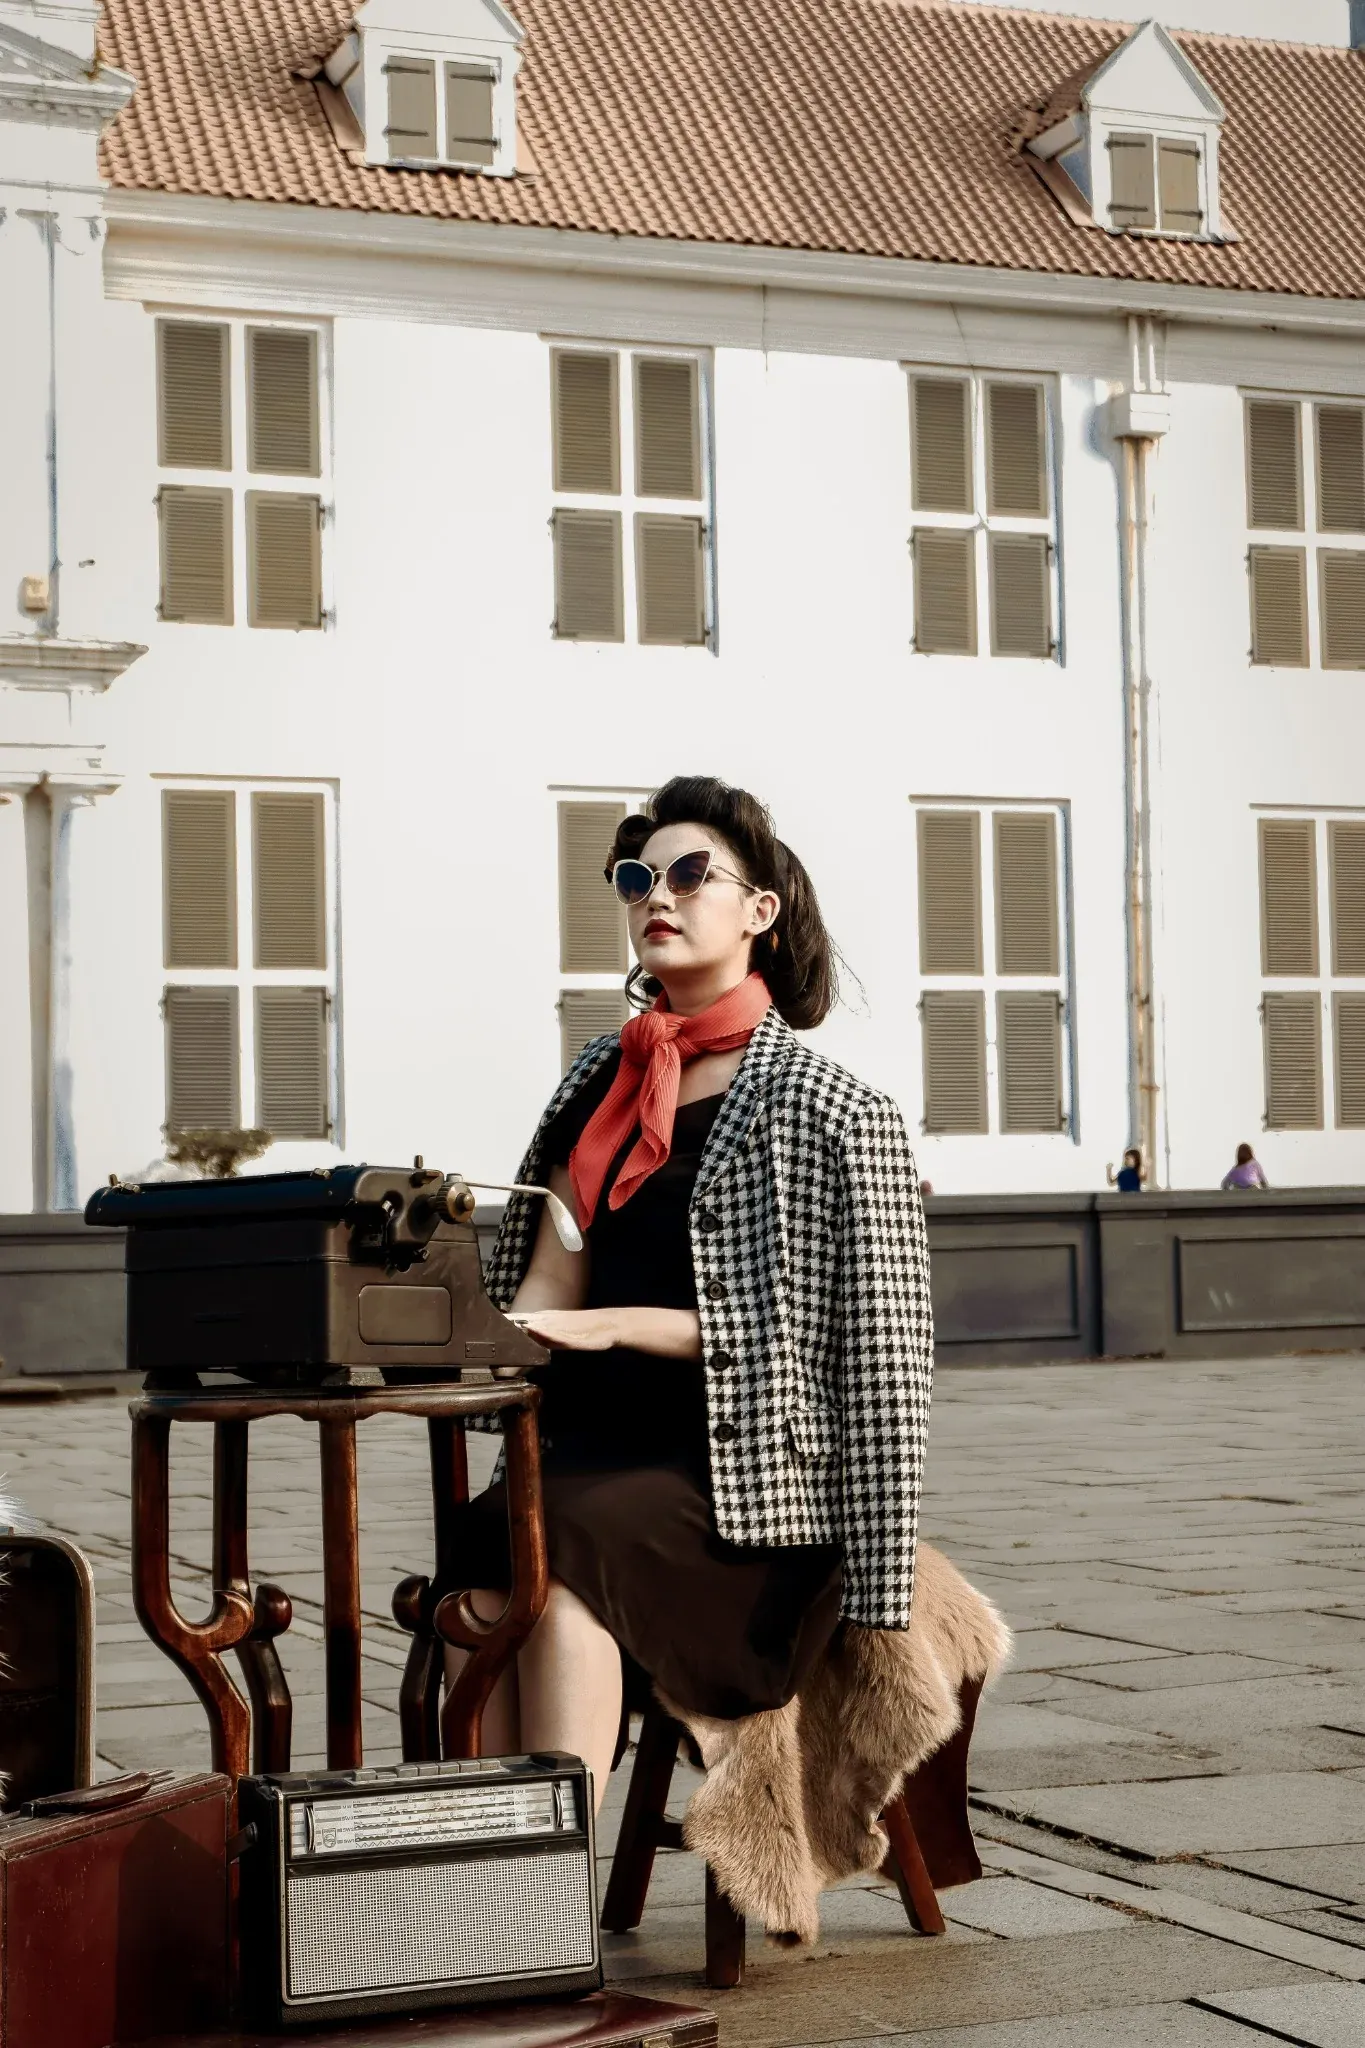
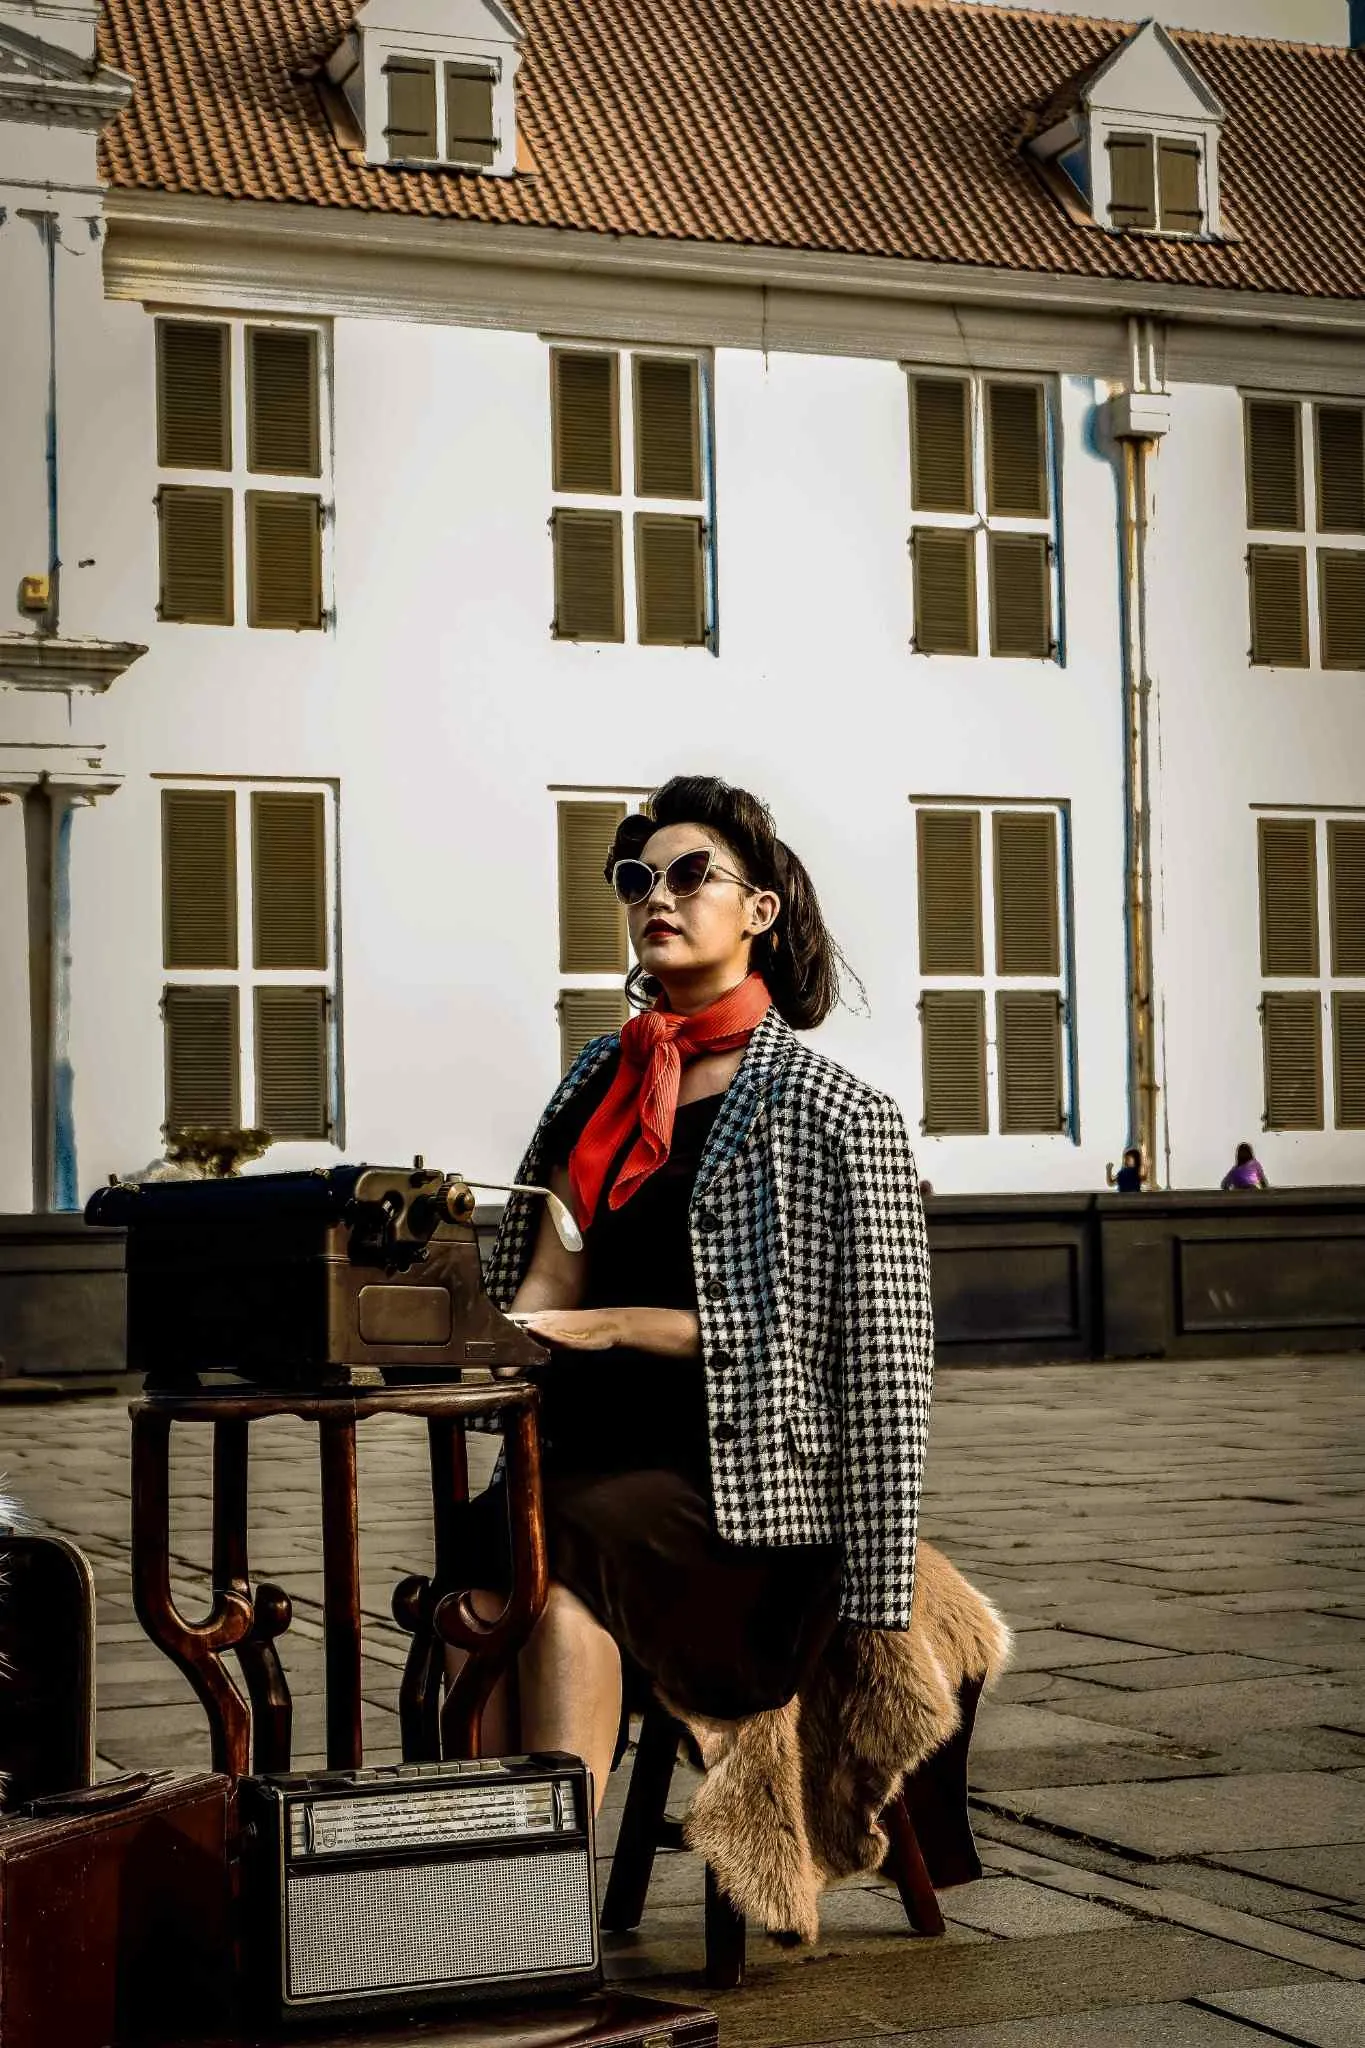
5. Beach & Summer Travel Scenes
Bright, sun-drenched outdoor scenes are where cinematic presets thrive.
For the beach photo, the original sand was a flat, dull color and the ocean looked plain. The preset instantly warmed up the sand, giving it a sun-kissed golden appearance. At the same time, the blue waves shifted to a vibrant teal.
The summer travel photo also showed similar improvements: the sky got a clean, film-like appearance, and the warm colors of the brick wall in the background became much more engaging.
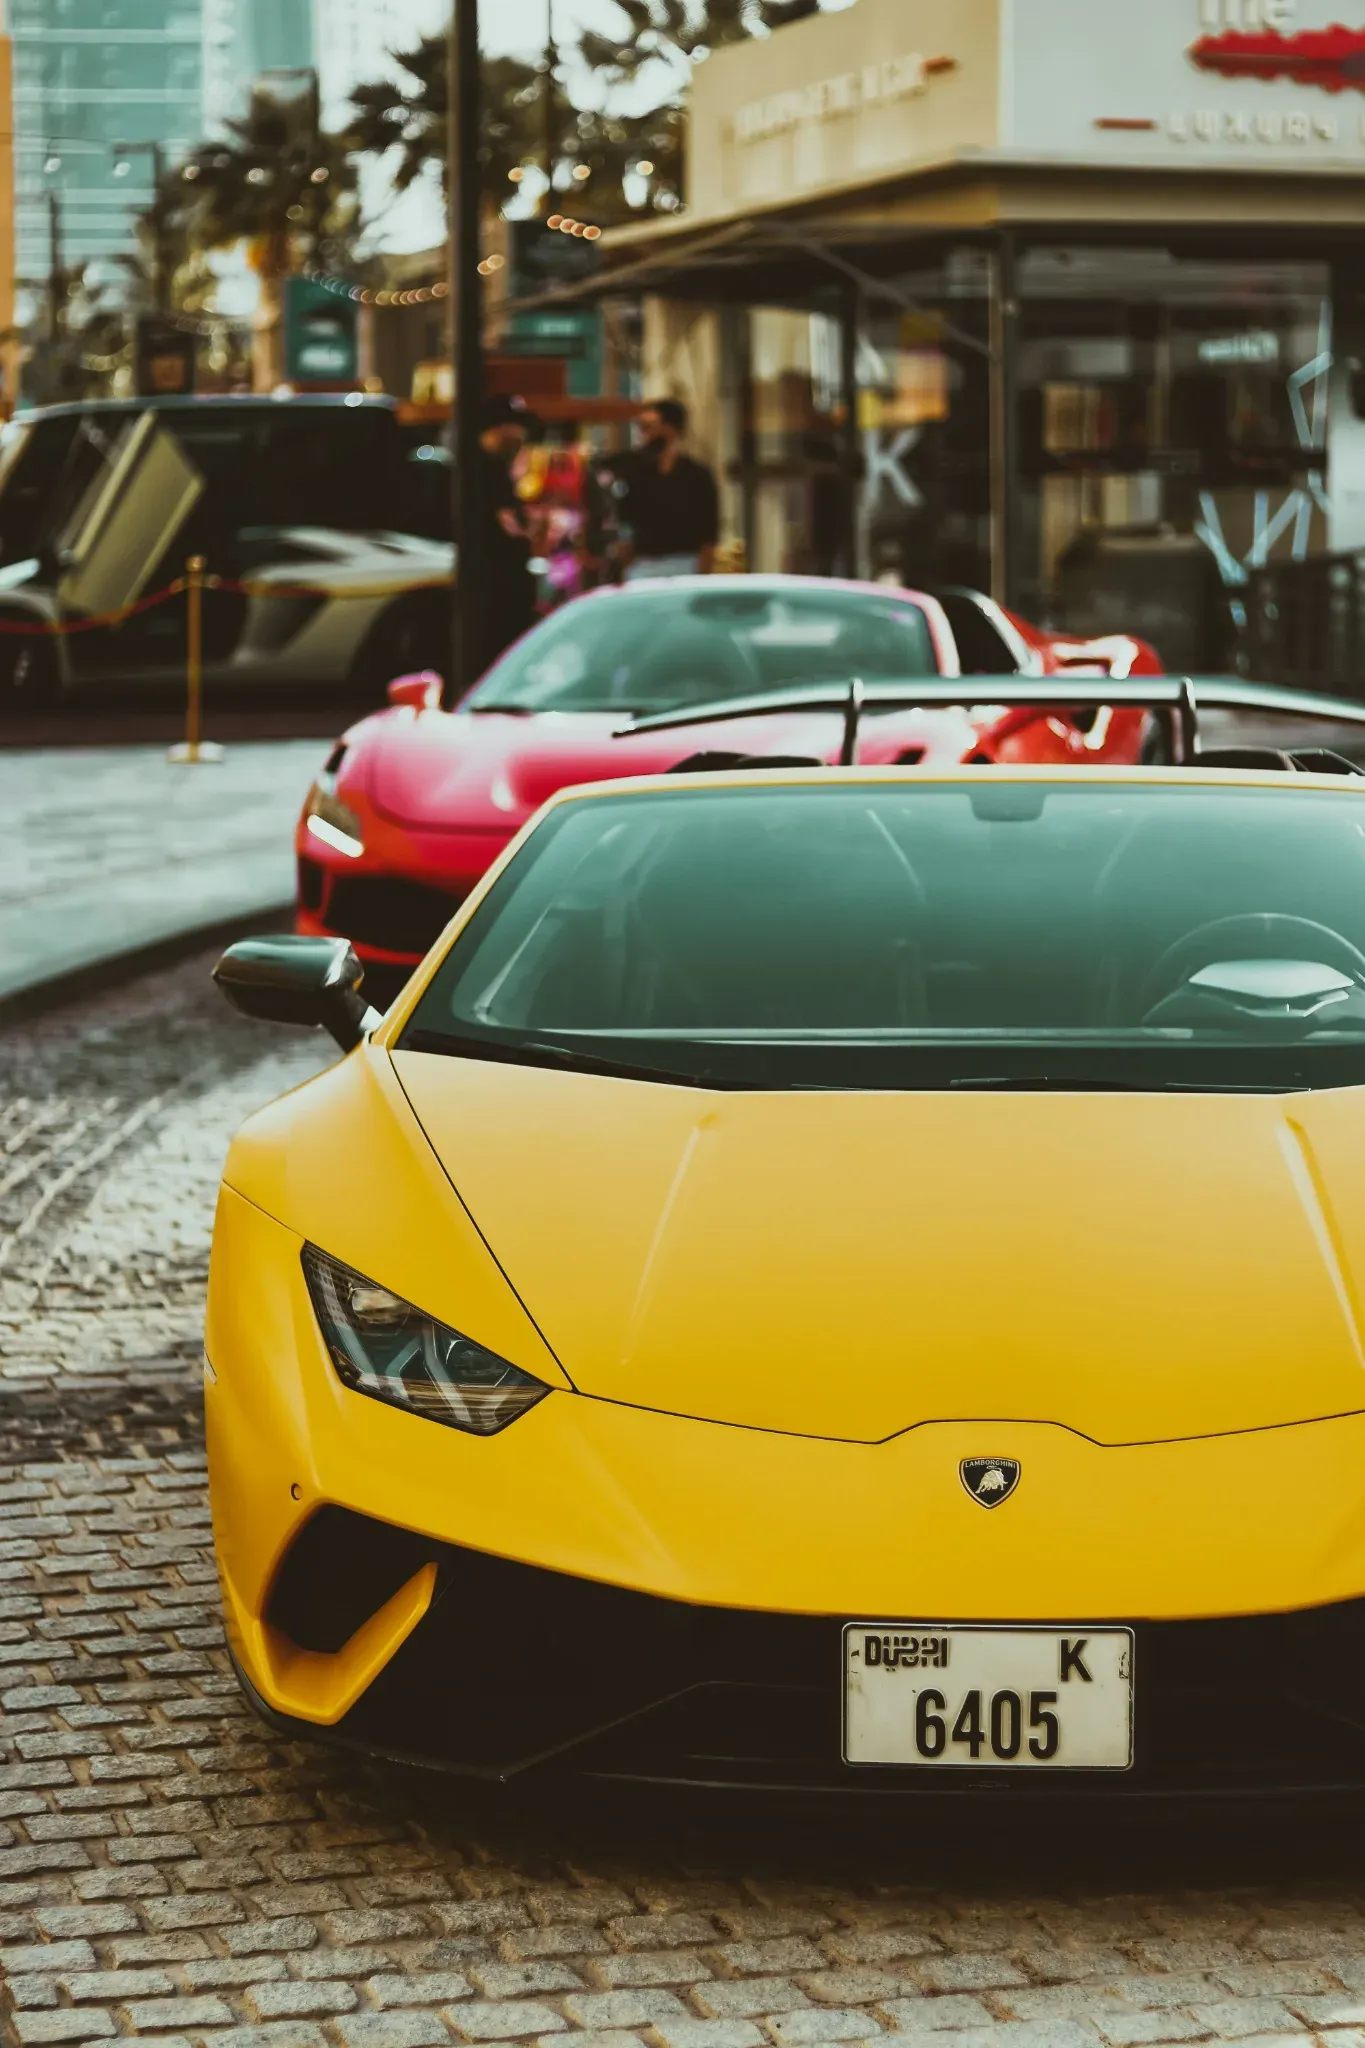
6. Car & Street Photography
Car and street photos are probably the most satisfying categories to edit with this preset.
In our car test, the bright yellow paint on the Lamborghini became deeper and richer. The street pavement gained a cool blue-gray cast, and the reflections in the windshield shifted to an attractive teal. This combination of deep yellow and cool blue gave the car a highly professional look.
For street photography, the preset performed just as well. The urban textures and buildings gained sharp details, and reflections on windows looked incredibly clean and atmospheric.
7. Dark & Moody Night Scenes
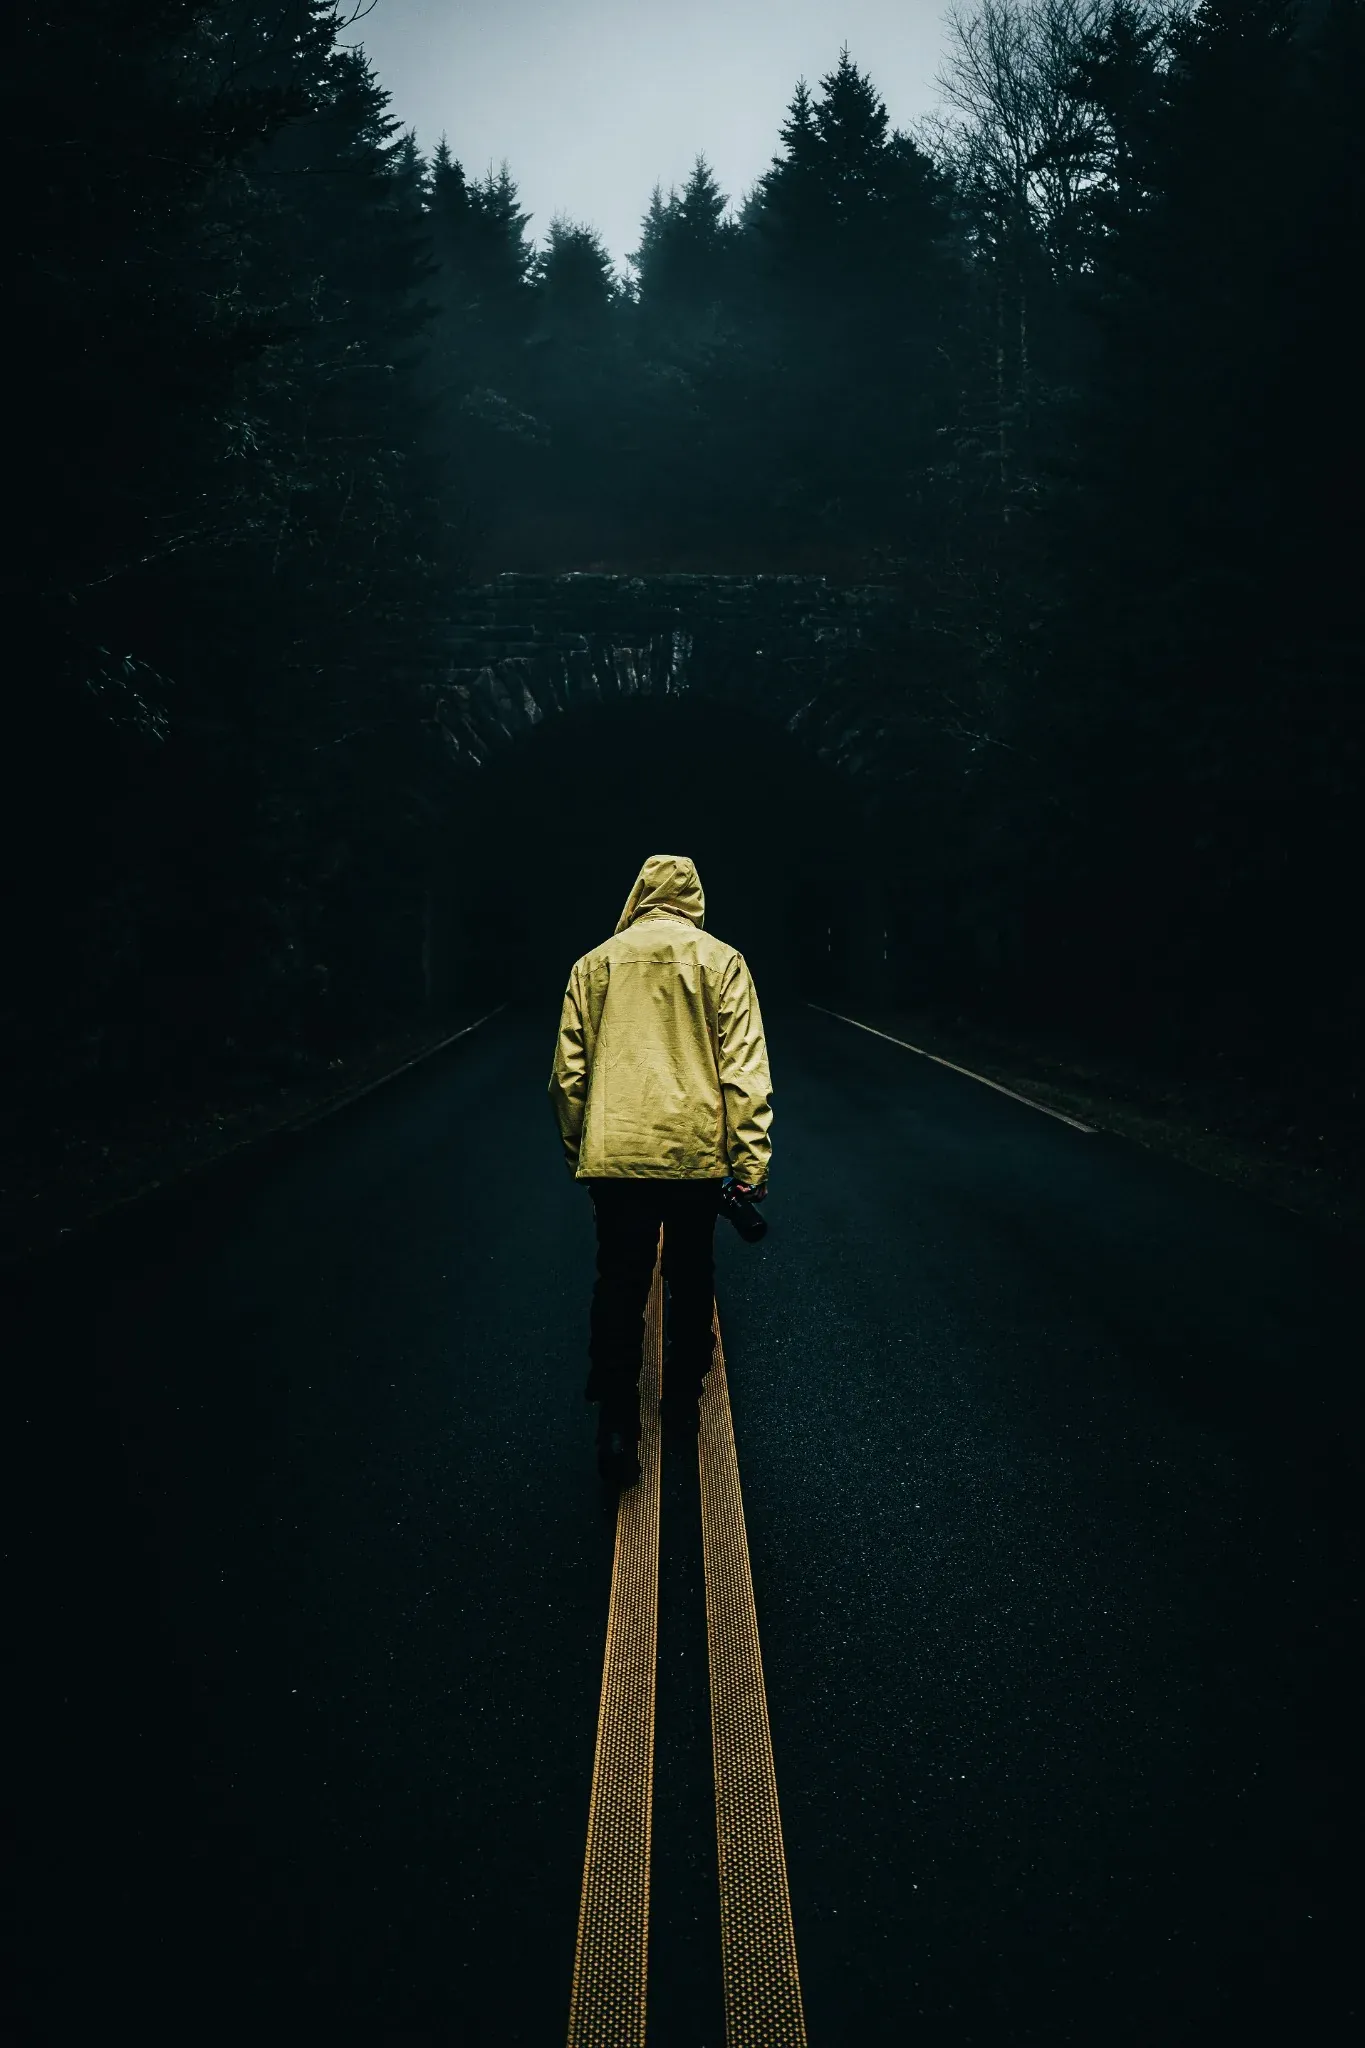
What happens when you apply the preset to an already dark image?
In the photo below, a photographer in a yellow jacket is walking on an empty forest road toward a dark tunnel. The original image was already dark, but a bit flat.
Applying the preset deepened the dark areas, making the forest and the tunnel look pitch black. Normally, losing detail in the dark areas is bad, but here it worked perfectly because it focused all attention on the subject. The foggy sky at the top got a beautiful blue-teal gradient, and the yellow jacket and yellow road lines popped with a warm golden glow.

Our Testing Summary Table
Here is our honest breakdown of how the cinematic preset performed across different photo styles, and what adjustments were needed:
| Photography Style | Performance Rating | Typical Adjustments Needed |
|---|---|---|
| Outdoor Portrait | Excellent | None (Usually perfect in one click) |
| Indoor Portrait | Very Good | Cool down Temperature (move slider toward blue) |
| Landscape | Excellent | None or small Exposure adjustments |
| Forest | Very Good | Lift Shadows slightly to recover bark detail |
| Beach & Summer | Excellent | None (Gives great golden sand and teal water) |
| Car Photography | Excellent | None (Enhances paint depth and reflection colors) |
| Street Scenes | Excellent | None (Makes concrete and lights look dramatic) |
| Dark & Moody | Very Good | Lift Shadows slightly if you want more background detail |
What We Learned After Testing 300+ Images
The biggest lesson from this experiment is that one-click editing is mostly a myth—but presets are still incredibly valuable.
A single preset did not edit all 300 photos perfectly on the first try. However, it did something even better: it gave 90% of the photos a professional, high-end starting point in one click.
Instead of spending five minutes adjusting curves and colors from scratch for every single photo, we were able to:
- Apply the preset.
- Spend 5 seconds adjusting the Exposure (brightness) or Temperature (warmth).
- Export the photo.
This drastically speeds up your workflow. Even better, it ensures that your entire photo collection maintains the exact same color style, making your Instagram feed or portfolio look unified and professional.
Final Verdict: Can One Preset Do It All?
So, can one Cinematic Lightroom Preset work for every photo?
Our answer is almost.
If you shoot outdoors—portraits, landscapes, cars, travel, and street scenes—this preset will work wonders and save you hours of work. If you shoot indoors under tricky lights or in extremely dark conditions, you will need to spend a few seconds tweaking the basic sliders.
Presets are not meant to replace your editing. They are meant to give you a professional foundation that you can finish in seconds. If you want to build a consistent style while spending less time behind a computer screen, a high-quality cinematic preset is one of the best tools you can use.
Frequently Asked Questions
Can one Lightroom preset work on every photo?
No, a single preset cannot edit every photo perfectly in one click. Because lighting, camera sensors, white balance, and colors differ for every image, you will almost always need to make small adjustments to sliders like Exposure and Temperature after applying the preset.
Why do presets look different on each image?
Presets apply fixed mathematical adjustments to exposure, contrast, and color channels. Since every photo starts with unique exposure levels, white balance settings, and ambient light, the starting points are different, which results in unique final edits.
Should you edit RAW or JPEG?
You should always edit RAW files when using presets if possible. RAW files contain uncompressed sensor data, which gives you far more room to recover highlights and shadows and adjust colors without losing quality or causing pixelation.
Do professional photographers use presets?
Yes, professional photographers use presets to speed up their workflow and maintain a consistent visual style across their portfolios or social media feeds. However, they use them as a starting point and make custom manual tweaks to finish the image.
How can I make one preset work better?
After applying a preset, immediately check your Exposure and Temperature (White Balance) sliders first. Tweaking these two sliders alone fixes 90% of preset issues by aligning the brightness and warmth of the photo to the preset's style.