If you've ever looked at a photo and thought "why does this look so warm and soft and real" — there's a good chance it was shot on Kodak Portra. It's one of the most loved color film stocks ever made, known for its gentle skin tones, warm highlights, and soft contrast that never feels harsh.
You don't need to shoot actual film to get that look. This free preset pack brings the Kodak Portra color profile to Lightroom, so you can apply it to your digital photos in one click.
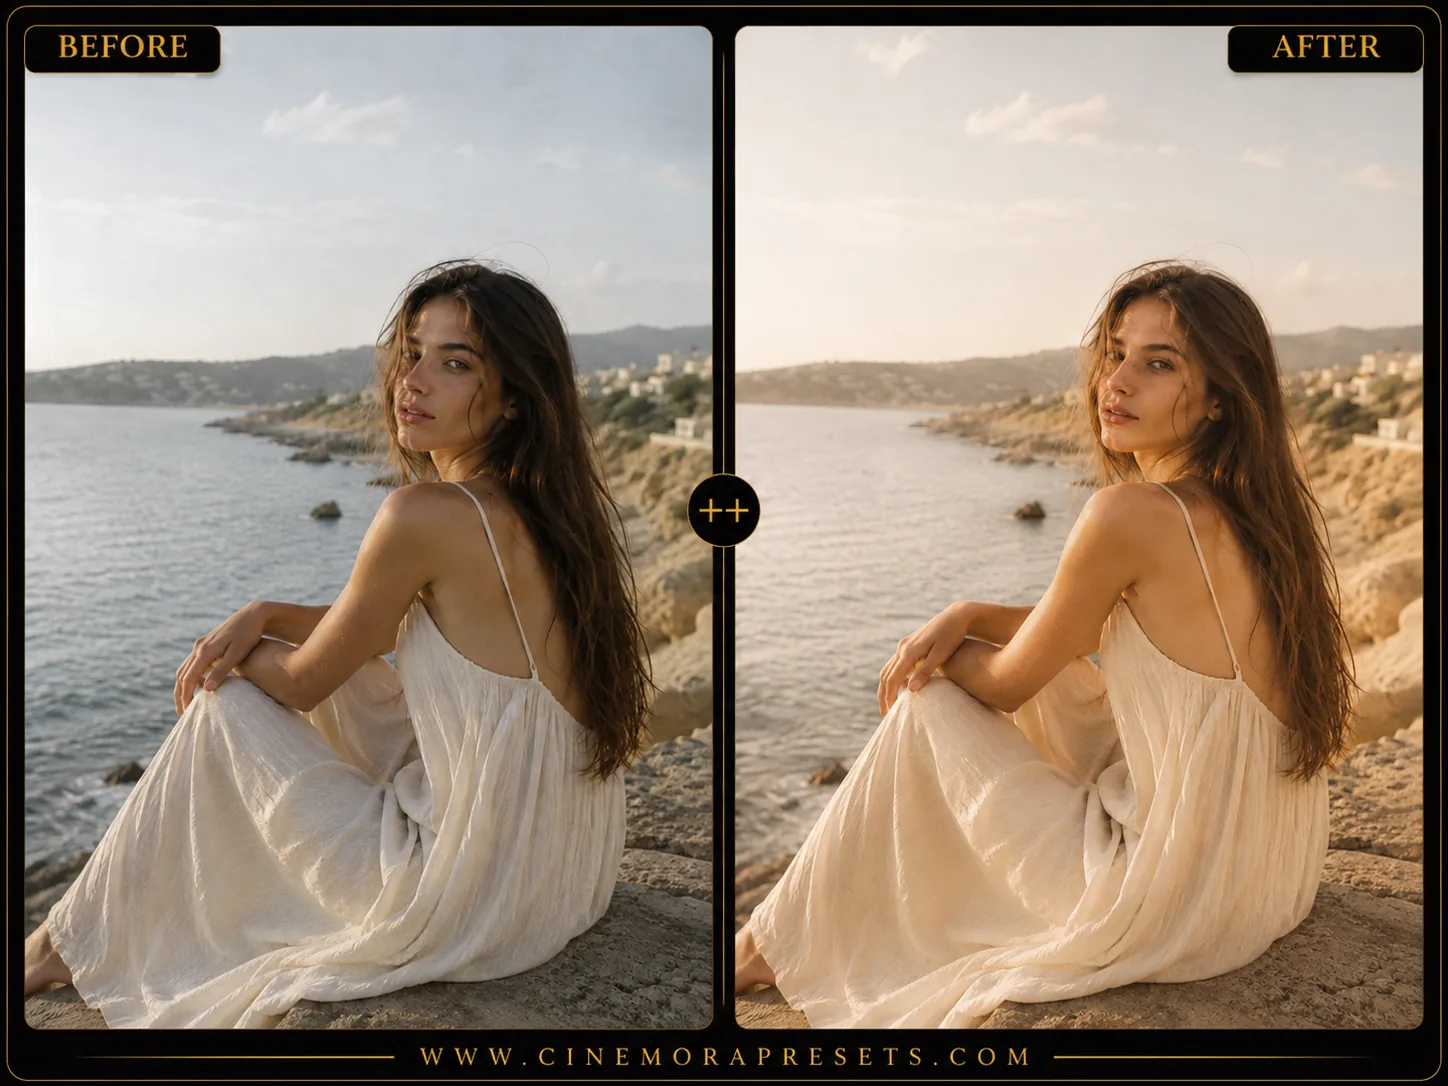
Recreating the Iconic Portra Color Palette
Kodak Portra is legendary in portrait photography for a reason. Instead of digital precision, it delivers warm, flattering skin tones and a soft, forgiving contrast curve. The shadows lift gently, highlights roll off smoothly, and the colors are beautifully balanced without being oversaturated.
Here is how you can customize this look for your photos:
Kodak Portra Lightroom Preset Settings & Slider Values
Exposure: -0.10 | Contrast: -18 | Highlights: -25 | Shadows: +22 | Whites: -10 | Blacks: +12 | Clarity: -5 | Saturation: -5 | Grain: 18 | Vignette: -8
For other beautiful film-like tones, try our classic Fuji Film presets or check out our premium Vintage Lightroom presets.
1. Adjust the Exposure & Temperature
Every photo is exposed differently. After applying the preset, adjust the Exposure slider if your image is too dark. Since Portra has a signature warm look, you can also slide the Temp to the right to add a golden-hour warmth.
2. Protect Skin Tones
Portra is designed to keep skin tones looking warm and creamy. If skin looks too saturated or orange, go to the HSL panel, select Orange, and slightly decrease the Saturation or increase Luminance.
3. Customize the Grain Texture
Our classic preset has a medium grain amount (18) to replicate Portra 400. If you want a clean look like Portra 160, reduce the Grain Amount to 0. For a grittier Portra 800 feel, increase the grain to 30 or 40.
Installation Guide
Setting up these presets on your phone or computer is very simple:
- Download the ZIP file containing the XMP preset files.
- If you need step-by-step instructions for your specific device, follow our guide on how to install Lightroom presets for instant setup help.
What's Included
This professional film-emulation pack contains five custom Kodak Portra presets, each designed to capture a different characteristic of classic Portra film:
- CM Portra 400 Classic (True Portra 400 standard. Balanced warm natural look, medium grain, creamy skin.)
- CM Portra Deep Warm (Rich, weighted Portra. Deep warm shadows, saturated skin, cinematic. More body than Classic.)
- CM Portra Fade Editorial (Airy lifted editorial fade. Near-zero grain. Crushed blacks removed. Magazine clean.)
- CM Portra Pushed Grain (Pushed Portra with heavy grain. Gritty, vintage, raw. Strong grain texture, moody shadows.)
- CM Portra Glow (Glowing golden hour Portra. Warm bloom, soft highlights, minimal grain. Dreamy overexposed feel.)
Preset Style & Color Tone
The core aesthetic focuses on warm highlights, desaturated secondary tones, and a soft tone curve. The shadows are gently lifted to eliminate harsh digital contrast, while skin tones are isolated and optimized in the HSL channel to remain natural, glowing, and warm.
Best Photos for This Preset
These presets are ideal for portraits, weddings, outdoor lifestyle, travel, and street photography. They perform best under natural lighting, golden hour, and scenes with warm tones.
After downloading, extract the ZIP file and import the XMP presets into Lightroom.
Frequently Asked Questions
Is this preset pack really free?
Yes. No signup, no email required, no watermarks. Download the XMP file and use it as much as you want.
Does this work with Lightroom Mobile?
Yes, these XMP presets work on both Lightroom Classic (desktop) and Lightroom Mobile/CC.
Will this preset work on any photo?
It works best on photos with people, warm or neutral lighting, and natural settings. Very dark or heavily backlit photos may need minor exposure adjustments after applying the preset.