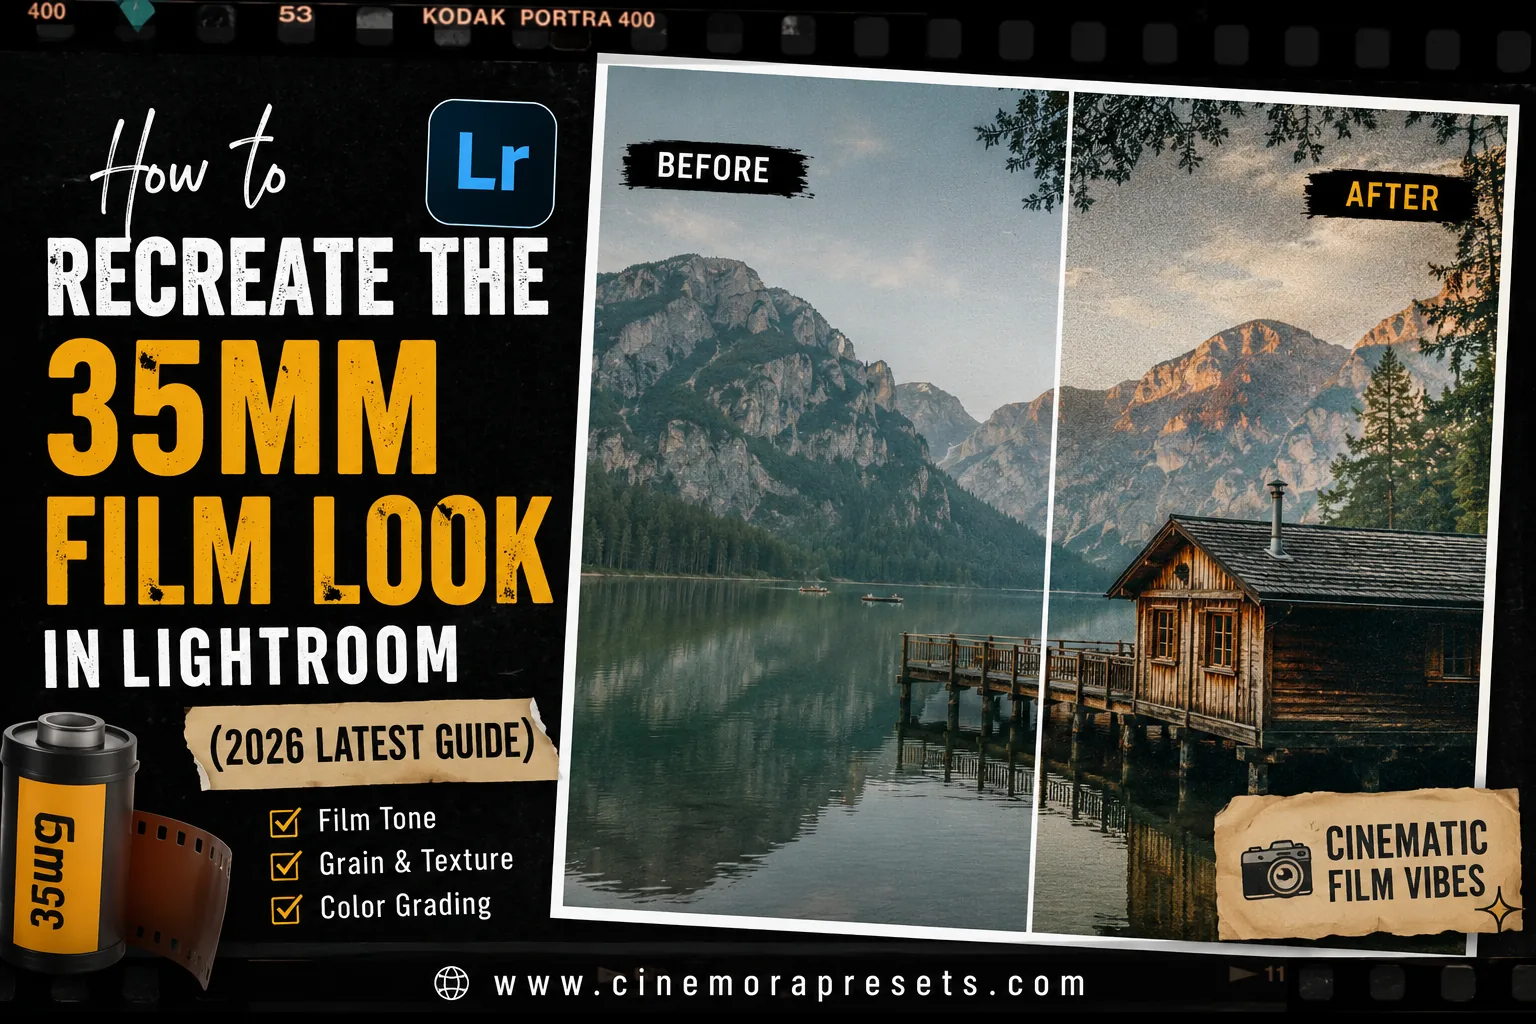
TL;DR: To get the authentic 35mm film look in Lightroom, you need to soften clinical digital contrast, dial in vintage color shifts, and introduce organic texture. In this latest 2026 guide, we'll break down the exact vintage film lightroom settings step-by-step so you can edit photos like 35mm film.
There is a reason the analog aesthetic is making a massive comeback. Modern digital cameras produce files that are technically perfect—pin-sharp, clean, and clinical. But they often lack soul.
The 35mm film look is defined by its imperfections: faded shadows, compressed highlights, organic chemical color shifts, and textured grain. It feels nostalgic, tactile, and warm.
If you want to know how to get film look in lightroom, you don't need a vintage camera. By applying the latest 2026 techniques, you can make your digital photos look like they were shot on physical Kodak or Fujifilm stock. Here is the step-by-step guide on how to edit photos like 35mm film.
Step 1: Soften the Contrast (The Tone Curve)
The foundation of any vintage photo is a soft, faded contrast. Physical film has a dynamic range that handles light differently than a digital sensor. Instead of deep, pitch-black shadows and harsh white highlights, film prints have a matte, compressed range.
To achieve this, we will use the Tone Curve:
- Open the Tone Curve panel and select the RGB Curve.
- Lift the Black Point: Click the bottom-left point of the curve and drag it straight up (about 5-8%). This fades the darkest parts of your photo, turning absolute black into a soft charcoal gray.
- Fade the Highlights: Click the top-right point of the curve and drag it down slightly (about 3-5%). This compresses bright highlights, preventing them from blowing out.
- Create a Subtle S-Curve: Add a point in the shadows and drag it down slightly, and a point in the highlights and drag it up. This keeps the midtone contrast punchy while maintaining the faded black and white points.
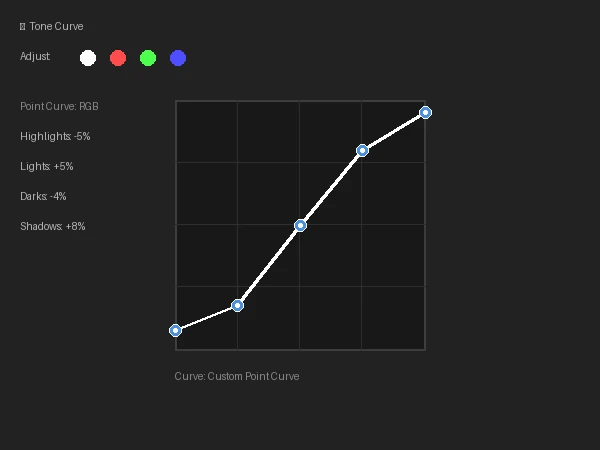
By lifting the blacks, you instantly give your image that faded paper or matte print aesthetic.
Step 2: Add Warmth & Shift Colors (Color Mixer)
Analog film chemistry is famous for its unique color profiles. Unlike digital cameras, which aim for accurate color reproduction, film stocks like Kodak Portra or Fuji Superia render colors in a highly stylized way.
To recreate these organic color characteristics, head to the Color Mixer (HSL) panel:
1. Shift the Greens to Teal
Digital greens are often bright and yellow-toned. Vintage film greens lean cooler and more organic.
- Go to Green Hue and shift the slider towards the right (+10 to +25). This pushes grass and foliage towards a rich, vintage forest teal.
- Go to Green Saturation and desaturate slightly (-10 to -20) to keep it looking natural.
2. Calibrate Warm Highlights and Cool Shadows
Film shadows often absorb surrounding ambient light, giving them a subtle cool tint, while highlights remain warm and sunkissed.
- Open the Color Grading panel.
- Shadows: Add a very subtle touch of blue/teal (Hue: 210-220, Saturation: 3-5%).
- Highlights: Add a warm yellow/orange tint (Hue: 40-50, Saturation: 5-8%).
- Adjust the Balance slider to the right if you want the warmth to dominate.
3. Polish Skin Tones
- Skin tones live in the Orange channel. Make them stand out by pulling Orange Saturation down slightly (-5 to -10) and lifting Orange Luminance (+5 to +15) to make skin look luminous and clean.
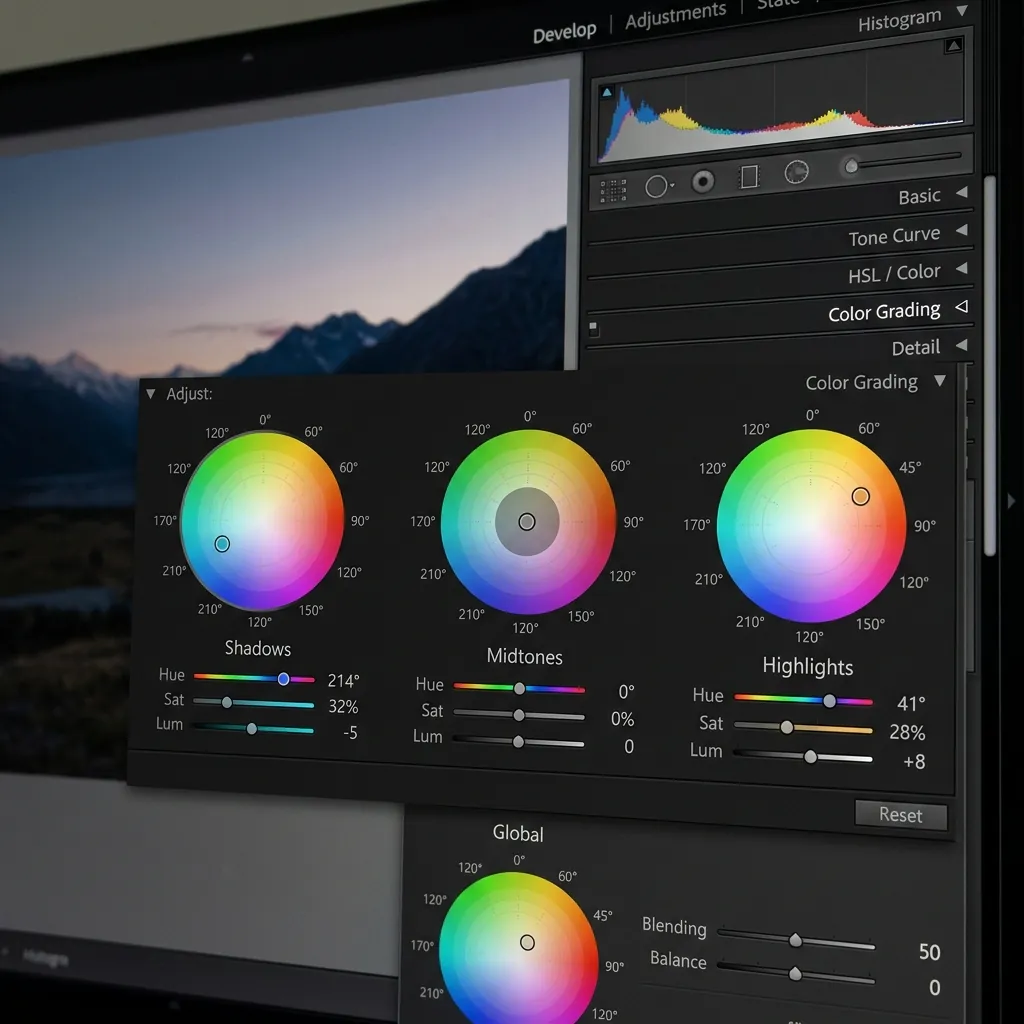
These subtle color shifts separate the subject from the background and recreate the warmth of nostalgic analog films.
Step 3: Introduce Texture (Effects Panel)
A digital image has "noise," which consists of tiny, sharp, color-speckled pixels. Physical film has "grain," which consists of silver halide crystals clustered together. Film grain is soft, clumped, and completely monochrome.
To emulate 35mm film grain, navigate to the Effects panel:
- Grain Amount: Set this between 25 and 35. This controls how visible the grain is.
- Grain Size: Set this to 30 or 35. 35mm film has a medium-sized grain structure.
- Grain Roughness: Set this to 45 or 50. Higher roughness makes the grain look less like digital pixels and more like organic, irregular film crystals.
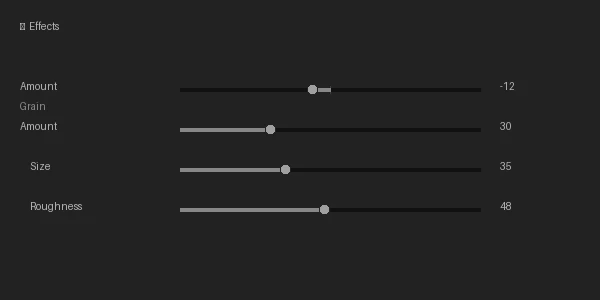
Pro Tip: Add a very slight Vignette (Amount: -10 to -15, Feather: 80) to mimic the natural light falloff that occurs in older vintage camera lenses.
Shortcut: One-Click Vintage Film Presets
Recreating these details manually for every single photo can be incredibly time-consuming. If you want to speed up your workflow and get consistent results instantly, using professionally designed presets is the best shortcut.
We have recreated the exact characteristics of iconic film stocks so you can apply them in one click:
- The Ultimate Analog Look: Download our Vintage Film Lightroom Presets for classic 35mm vibes.
- Portraits and Skin Tones: Get the legendary, soft skin tones with our Kodak Portra Presets.
- Cool Tones and Rich Greens: Recreate the cinematic green tones with our Fuji Film Presets.
- Nostalgic Party Vibes: Recreate the high-contrast, saturated look of disposable cameras using our Disposable Camera Presets.
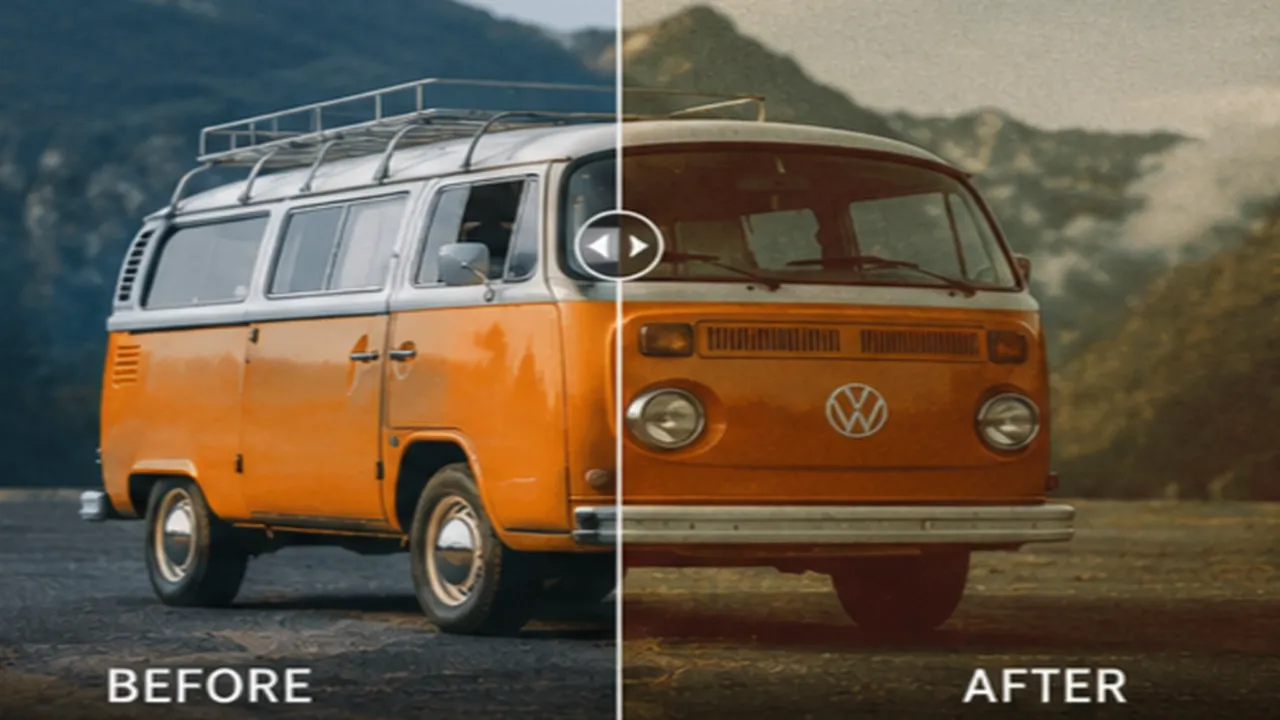
Whether you choose to dial in the vintage film lightroom settings manually or take the preset shortcut, shifting away from clinical digital perfection will instantly bring more atmosphere and emotion to your photography. Grab your camera, start editing, and enjoy the beauty of the analog look!
Frequently Asked Questions
How do I get the film look in Lightroom?
You can get the film look by softening contrast (lifting blacks and pulling down whites via the Tone Curve), shifting colors to mimic analog chemistry (warming up midtones/highlights, cooling shadows, and shifting greens to teal), and adding a realistic layer of grain in the Effects panel.
What are the best vintage film lightroom settings?
The best settings involve lifting the black point of the Tone Curve by 5-10%, reducing highlight contrast, shifting Green Hue towards teal (+10 to +20), and setting Grain Amount to 25-35, Size to 35, and Roughness to 45-50.
How to edit photos like 35mm film in Lightroom?
To edit photos like 35mm film, you should focus on replicating the imperfections of analog cameras. This includes matte shadows, warm skin tones, teal-tinted greens, subtle halation/highlight compression, and organic grain.
Is there a shortcut to get the 35mm look in Lightroom?
Yes. You can use pre-made Lightroom preset packs that emulate specific film stocks like Kodak Portra, Fuji Superia, or vintage disposable cameras to achieve the look in a single click.